"Weeds"

I’ve always found gardens to be a fascinating micro-environment. There is something deeply soothing about the symmetrical element that human stewardship brings to a garden. Mixed with the seemingly random designs of nature, a garden comes together to be a beautiful blending of natural forces and the human spirit. But there is something about gardens that ever since I was a little kid, I have never really understood. Why do some plants get to grow in the garden, and some don’t? “Weeds”; the infamous bad guys that are here to destroy all of our hard work and claim our garden as their own. Let’s take a closer look at these “bad guys”, because understanding them better can help us understand our gardens better.

IMG_2150.jpg

A “weed” is defined as a plant that is not valued where it is growing. Though some “weeds” we don’t want anywhere near our gardens, this does not necessarily mean that all “weeds” are harmful to our gardens. Some can actually be very helpful for us depending on how we use them. We will take a closer look at some of the more common weeds here is the Gunnison Valley and some techniques to either work with the weeds, or dispose of them in more efficient ways.  

IMG_2151.jpg

General weed techniques.

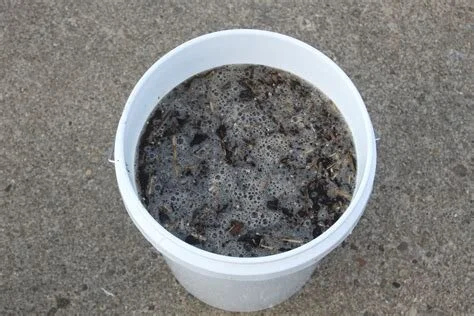
By far the most efficient way to control weeds in your garden is to have your garden fight against them for you. This can be done by not letting bare soil stay exposed. Planting smaller crops between your main crops (such as broad sowing greens) that you harvest from while they are small is a good way to fight against weeds. So is planting cover crops such as clover or legumes. These cover crops will outcompete the weeds, and help to nourish your soil.  Another technique for covering exposed soil is to mulch it. This will make it harder for the weed’s seeds to germinate, and also have the side effect of helping retain water in your garden. Watering only where you need to water is another good technique to limit weeds through your garden.

IMG_2154.jpg

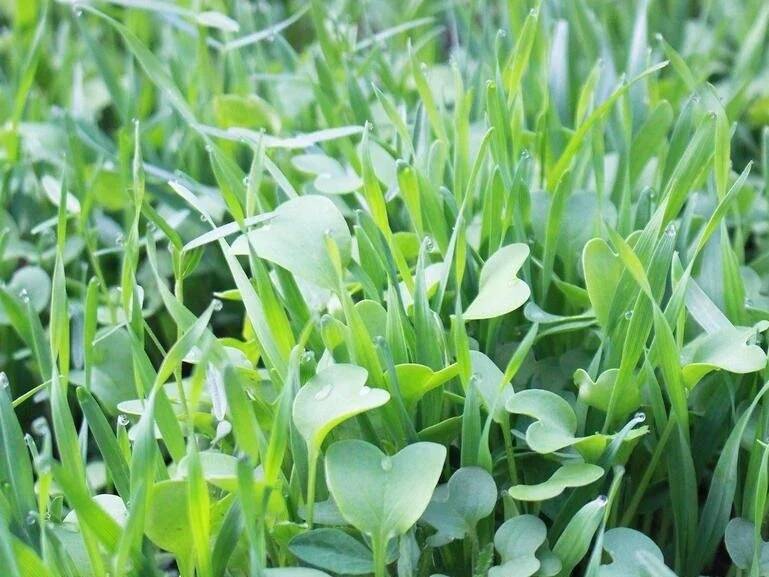
Grass. Smooth broom (Bromus inermis) & Cheat grass (Bromus tectorum)

The two main grasses that gardeners struggle with here is cheat grass and broom grass. When mechanically removing both grasses, it is important to remove the roots as well because grasses spread through their roots. One trick that can help you keep them out of your garden is to create a perimeter around your beds. If you are growing in a raised bed, you can lay down cardboard at the bottom of your bed, to stop the roots from coming up into your garden. If you bed is on the ground, then you can dig a trench at least 8” deep around your garden bed that you place cardboard down into. This will stop the roots from coming in from the side.  Grasses are prolific though, and a little bit of weeding every day is going to be your best approach. Looking at cheat grass specifically we can turn one of its strengths into its downfall. Cheat grass got its name from the way that it cheats the growing season by popping up earl in the spring, and going to seed by mid-summer. We can go after cheat grass early in the season before we get our seeds or starters in the ground.

IMG_2153.jpg

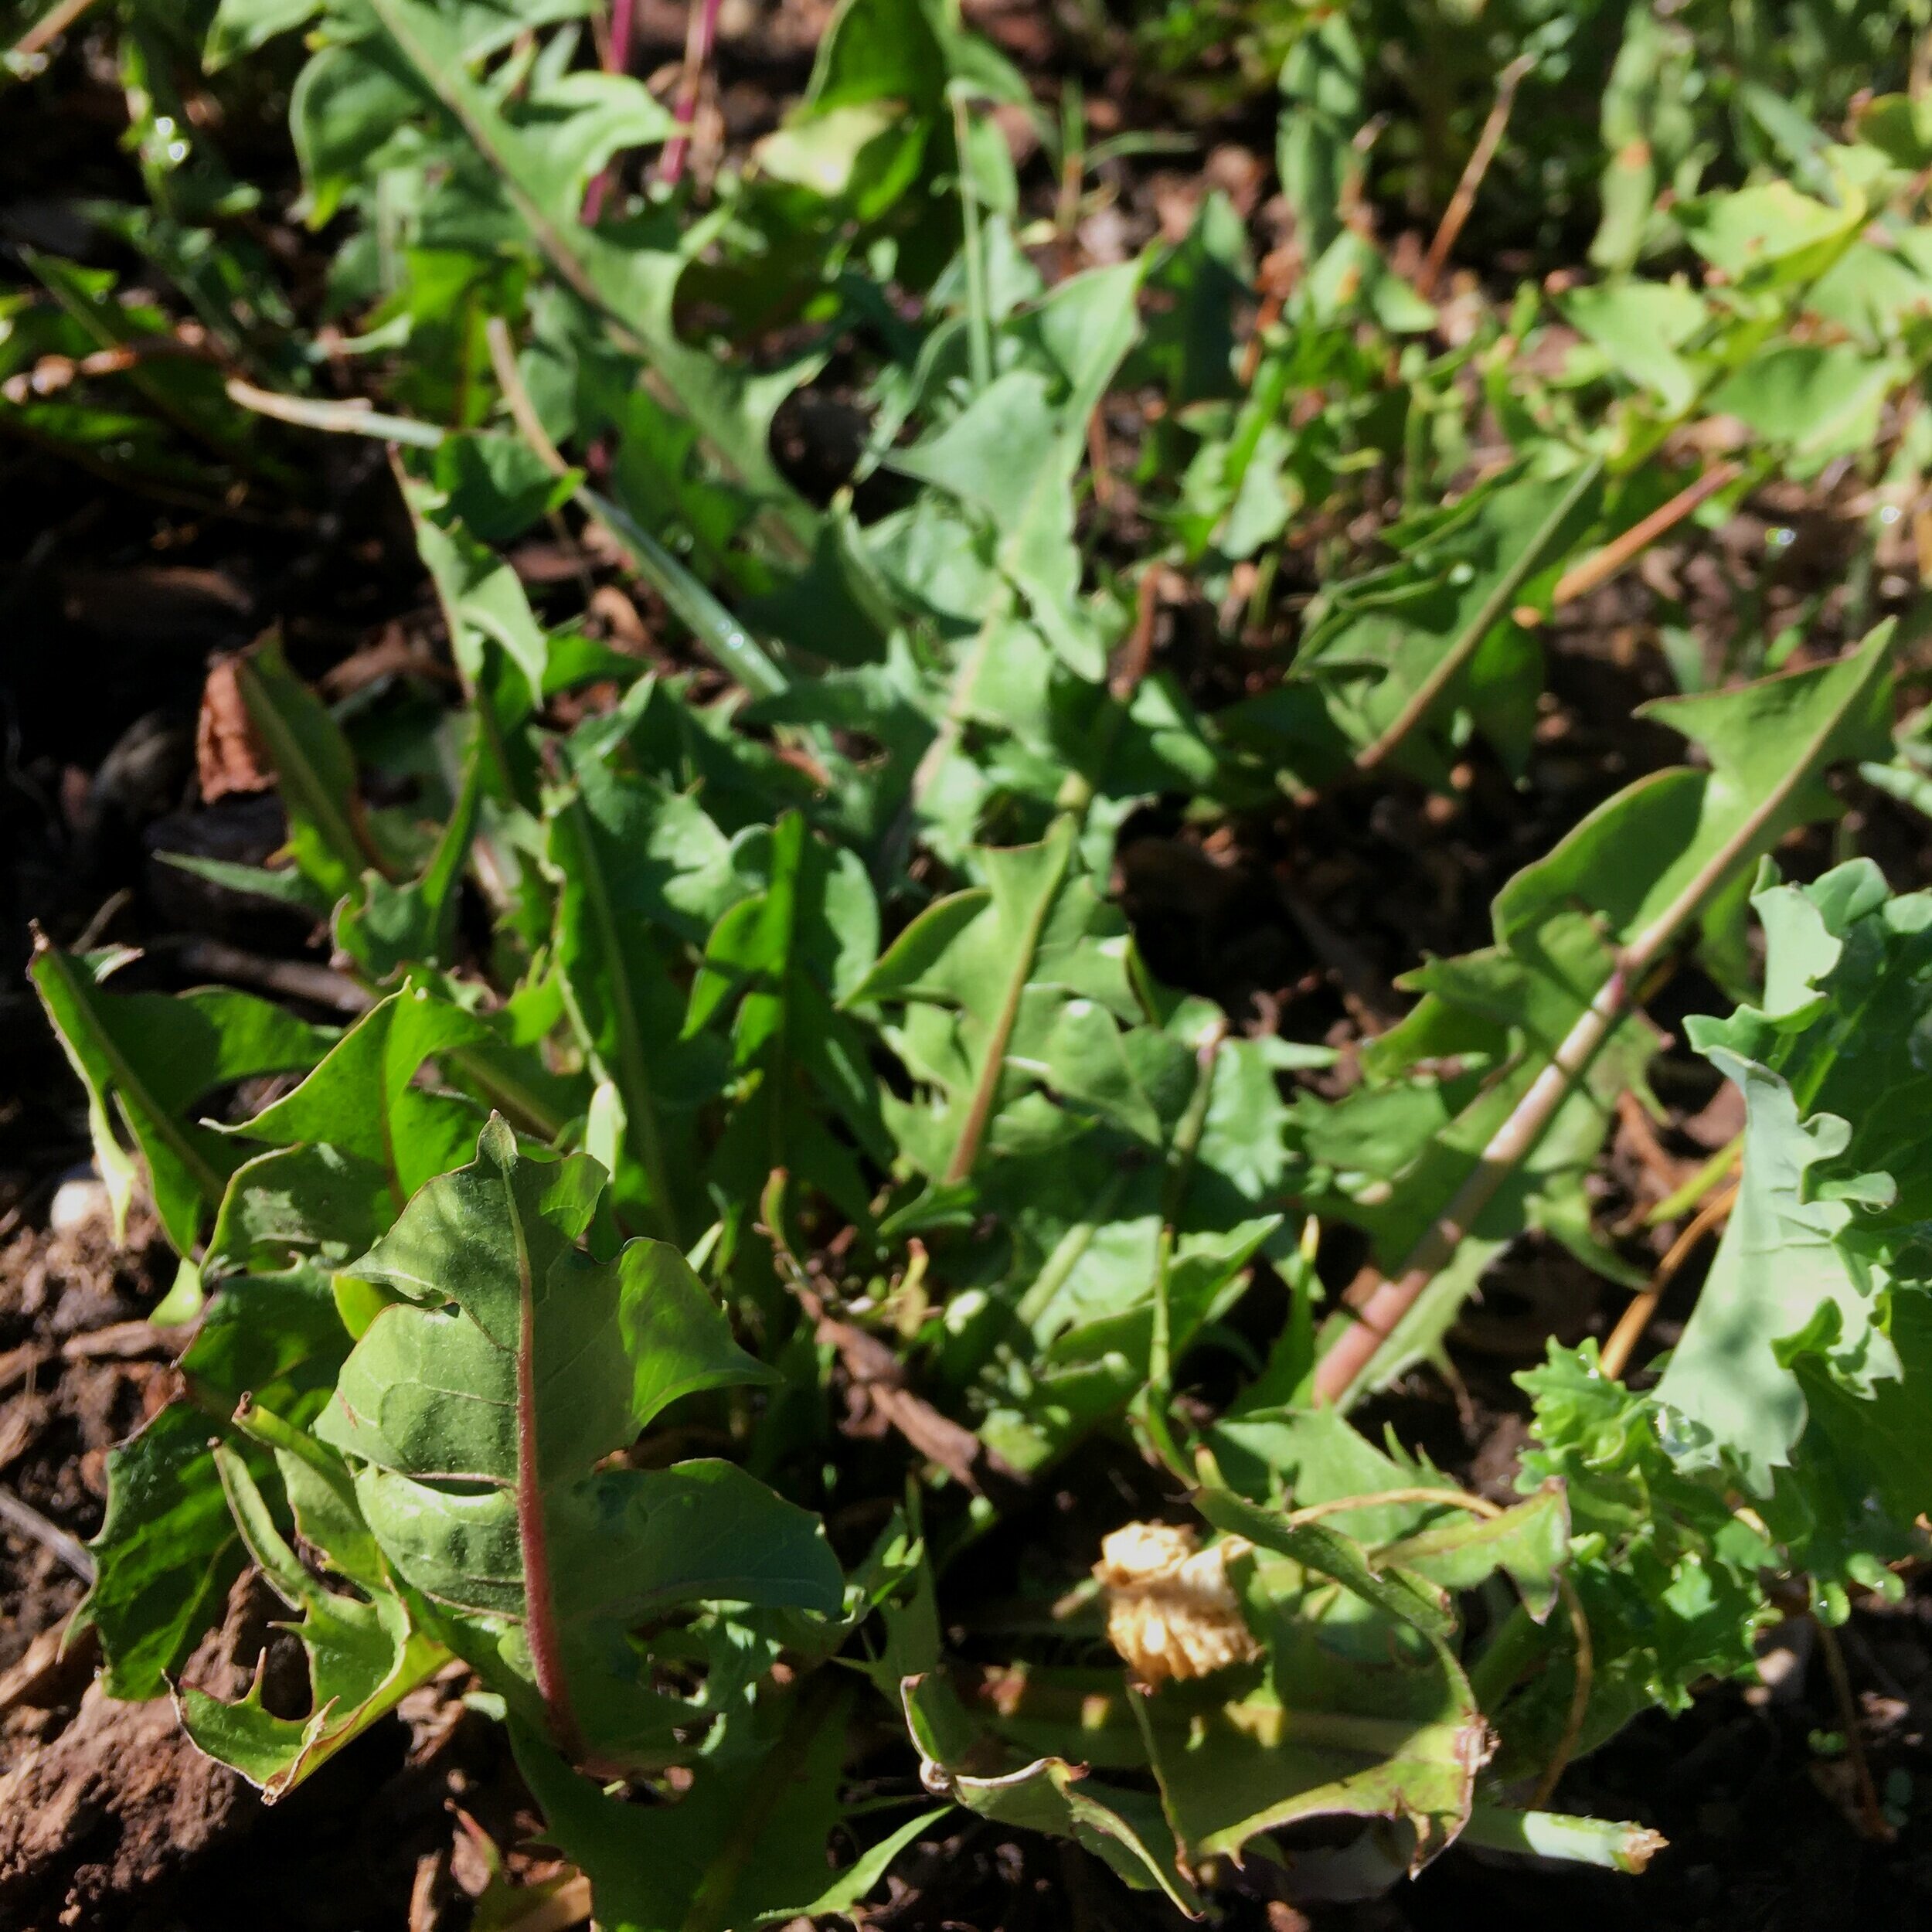
Dandelion (Taraxacum officinale)

Dandelions  are the most notorious “weed” that isn’t really a weed. Dandelions are not listed as an A, B, or even C noxious weed, and some weeding companies don’t even remove them. Though dandelions can be problematic for a manicured lawn, they have many advantages when used in the right way. Firstly, they are a vital food source for many pollinators coming out of winter since they are one of the earliest flowering plants. In addition to being great food for pollinators, they are also great food for us. Every part of the dandelion is edible, and they have one of the highest concentrations of vitamin A that is found in any leafy green. Their greens make great additions to salads, and when dried, their roots make a great and healthy tea. The reason dandelions are so prolific, is because they are a dynamic accumulator. They have a deep perennial tap root that they grow out of every season, and is almost impossible to fully pull out of the ground. But this tap root also makes the dandelion a great resource for us. This root pulls nutrients up from deep down in the soil that normally other plants don’t have access to. The leaves of the dandelions can be added to our compost to reintroduce these nutrients back into the soil at a level that the rest of your garden can access.

dscf2809.jpg

Lamb’s quarter ( Amaranthavease)

Lambsquarter, also known as white goosefoot, is a widespread weed. It grows well in deserted soil (i.e our garden beds). This plant is a member of the amaranth family which also includes quinoa and spinach. This plant is edible, and often called wild spinach. Lambs quarter is easy to manually pull while it is still young.

IMG_2145.jpg

Field bindweed (Convolvulus arvensis)

Bindweed is often a nightmare for gardeners. Due to the massive underground root system that can extend multiple feet, hand pulling bindweed will only fuel the fire of root propagation. Repeated manual pulling, and excavation of the roots, is really the only way to rid your garden of the bind weed. However, redirecting its growth and trimming it back can also be an effective way to minimize its impact on your garden.

IMG_2143.jpg

Canada thistle (Cirsium arvense)

Canada Thistle is by far the most widespread and common weed found here in Colorado. This plant is a nightmare for gardeners. Similar to field bindweed and yellow toadflax (Linaria vulgaris), this plant can spread underground through rhizomes. Hand pulling the weeds can propagate the roots, and their seeds spread easily through the air. Cutting these plants back can be one of the easiest ways to deal with them.

IMG_2147.jpg

Common purslane (Portulaca oleracea)

Common purslane is a succulent similar to the native Coloradan plant stonecrop. Purslane spreads though micro seeds, which means that it this weed will pretty much always be with you. Luckily they are very easy to mechanically pull. At our farm, once a crop is well established we will often let the purslane grow around them because they compete very little with the other crops, and can help prevent erosion. They are also edible, and have a slight lemony flavor.  

IMG_2159.jpg

Spiny sow-thistle (Sonchus asper)

Spiny sow-thistle is less hardy than Canada thistle. The leaves are waxy and the stem is actually a tube versus thick fibers like in the Canada thistle. Like other thistles, the spiny sow-thistle is edible. Though the spikes can be a little intimidating, they can be broken down through the process of cooking or simply rolling in-between hands. Spiny sow-thistle, unlike Canadian thistle, does not spread through its roots, so pulling them can be an effective way to keep them under control.  

IMG_2158.jpg

Alfalfa (Medicago sativa)

Many of us know alfalfa as a crop that is grown for feeding livestock, but this plant can also have benefits for us in our garden. It is edible when it is a sprout, and the flowers are edible as well. Along with being something that we can harvest from our gardens early in the season, this plant has benefits for our garden. Alfalfa is part of the legume family, meaning that it has those rhizobia bacteria that introduce nitrogen back into our soil. They also make a great biomass to add to your compost.

What plants we consider “weeds” can be a very subjective thing when we are looking at our gardens. We should take a closer look at what we have growing and try to learn about th3ese plants so we can either find more effective ways to deal with them, or learn about what services they are providing us for free.


Harvesting tips

Late summer can be one of the best times for us as gardeners. We have been working hard in our gardens since the start of the season; seeding, reseeding, weeding, watering, thinning, pruning, covering and uncovering every day, and managing pests. But in late summer all of our hard work comes to fruition as we see our gardens taking off. Those Little broccoli starts that went in the ground 4 months ago now have heads on them that are bigger than those starts were. Our gardens now feel cramped as our squash plants make it so we can’t see the grown underneath all of the vegetation. These are the times that we as gardeners live for. But now that all of our food is getting ready what is the best way to harvest it? There is definitely some skill and knowledge in knowing when to harvest from your garden, and different techniques to use. Because of this, I went and asked some expert gardeners in the Valley different techniques that they use, and what some of their harvesting tips.

harvest when things are ready.

harvest-carrot.jpg

Ultimately there is not a hard and fast rule for when you should harvest from your garden. A lot of it depends on what you are wanting to get out of your harvest. The longer you let most veggies go, the bigger they get, but the tougher they get.

Harvesting Greens

Harvest greens from the outside of the plant so that the "heart" keeps growing. When it begins to heat up, you want to cut the flower to stop them from bolting. If you stay on top of this, you can get another couple of weeks or more out of them.

For storing them, try putting 3-4 sheets of paper towel at the bottom of a plastic bag, rinse leaves, and put them in a bag in the refrigerator. It is important to have an air bubble in the bag. I find that it keeps greens fresh and crisp for a couple of weeks.

Continual harvesting

1452647661962.jpeg

Swiss Chard, kale, other greens (if you can keep them from bolting) beans, peas, berries, squash, edible flowers, and herbs are all great plants that you can harvest from for most of the growing season here in Gunnison.

Thin harvesting

9eb107a2-83db-48d8-aea8-1a15009433d0-9020251.jpg

Thin harvesting is a concept where you delay some of your thinning, and wait to do it when your veggies are big enough so you can use what you thin. This is something that we do out at our farm. We will thin harvest a bed of carrots for four weeks to provide carrots for our CSA.

When do you start harvesting in your garden?

You can harvest Greens, radishes, peas, and other veggies that mature quickly throughout the summer, but August is when things really peak. You can begin to harvest most everything that is growing in your garden. You can keep your more frost resistant crops going into September. However, if you are looking to extend your growing season, you will want to do something to extend your growing season. Something like frost cloth. This is a good time to harvest potatoes as well.

Root vegetables

IMG_2076.JPG

size is up to you. You want big enough to eat but not so big that they are woody and hard as a rock... Roots are quite frost resistant as well. Mulch them with hay and as long as you can dig them out keep them in the garden.

With your potatoes, you are going to want to wait until the leaves start to turn brown. Carrots and beets will get slightly sweeter if you keep them in the ground for the first light frosts.

Brassicas.

IMG_9006.jpg

     It can sometimes be hard to tell when your brassicas are ready. The easiest way to tell is to test the firmness of their head. With any cabbage, you want to make sure the head has firmed up before you harvest it. Brussels sprouts will come between the leaves. You want to check their firmness just like you do with the other brassicas. If they are ready, just snap and it will come off. The plant will continue to grow upwards and so will the sprouts.

 Broccoli

     will form a main head. Cut when the little green "flowers" are "puffed" but not starting to show the yellow flowers. You should have more shoots coming up from the lower branches. If you miss your window, or you are just a big fan of broccoli, the leaves have the same broccoli flavor.

How do you know when garlic/onions are ready to be harvested?

IMG_2873.jpg

You want to wait until the leaves start to turn yellow. If you harvest them before this, they won’t have a hard-outer layer and won’t store well.

This is by no means an all-encompassing account of everything that you need to know when it comes to harvesting techniques, but I do want to thank Benedicte Henrotte a master gardener, and Jenna Kelmser with Westerns Organics Guild for the information they provided. This information was very helpful. And for all of you gardeners out there. If you have found any good tips or tricks for harvesting let us know at sean@mountainrootsfoodproject.org


Cover Crops

It’s weird to think that now that our gardens have just started taking off and we need to start thinking about prepping them for winter. But this is the place that we live in. We enjoy the summer months and the warmth that they bring, but we all understand that winter is always looking over our shoulder, lingering in the backdrop - we need to start thinking about getting our gardens ready for it. Luckily the cold weather is still far enough away that we are not needing to cover up our gardens with frost cloth yet. But there is one thing that we should get a start on now that will help out our gardens for next season. Planting cover crops. Cover crops are crops that are planted not for a harvest, but to cover the soil. Cover crops have been a common practice in agriculture for almost as long as humans have been farming. They are beneficial for a variety of reasons including

garden-cover-crop-mix-grown-wm_800x.jpg

Soil erosion

The bio mass of the roots helps to hold together the top soil, preventing the loss of valuable nutrients from top soil erosion.

Water conservation

The biomass helps to retain moister in the soil by preventing runoff and evaporation. The extra biomass above ground also adds to the evapotranspiration of your garden creating a micro climate that is cooler reducing water loss through evaporation.

Pest management

The cover crops help to create a more diverse food source for pests. Instead of the pests only being able to eat the plants you are growing for harvest, they can munch on the cover crop that are adding diversity to your garden. In addition to this, the cover crops create an environment for natural predators to live in.

Weed management

The biomass will out-compete many weeds in our gardens preventing the spread of noxious weeds.

Soil health

In addition to all of this, cover crops are great for restoring soil nutrients. Many plants that are used as cover crops have properties that restore nutrients into the soil, such as legumes for their rhizobia bacteria in the roots, or clovers for their tap roots that pull up deeper nutrients.

There is a large variety of cover crops out there, from clover to barley to radishes. What kind of cover crop you should use depends heavily on what you are wanting to get out of your soil, as well as what region you are gardening in. Luckily for us, the Gunnison Conservation District has done all of this work for us already. They have created a cover crop mix specialized for the Gunnison Valley. I caught up with Sam Liebl with the Gunnison Conservation District, and fellow victory gardener, to learn more about this cover crop. He broke it down for me and explained why this cover crop mix is best suited for the Gunnison Valley. Here is what he had to say about it.

IMG_2124.JPG

“Our short growing seasons in the Gunnison Valley can make the prospect of cover cropping seem daunting. Fortunately, frost tolerant species like those included in this mix allow us to improve soil with living matter either very early or very late in the year. Let's look at each species in the mix and see why it earns its place in our garden beds.”

Oats

oats-green-ShannonVanRaes.jpg

At the Gunnison Conservation District, we sometimes assist landowners by searching the country for the seeds of rare and therefore expensive species. Oats is not one of those species! Indeed, oats is one of the least expensive options we have for cover crops because it's grown in vast quantities across North America. Oats is a dependable and versatile cover crop that enjoys cool weather. It creates an abundance of above- and below-ground growth that suppresses weeds while soaking up excess nutrients, such as the nitrogen we add to our soils with manures. Oats helps legumes such as hairy vetch and red clover grow and can help those pea family plants contribute more usable nitrogen to soils. Winter will kill oats, and spring crops can often be planted directly into the brittle oats residue.

Triticale

triticale-crop-advance-cover-crops1.jpg

Triticale is a cross between wheat and rye that, like oats, produces lots of carbon-rich biomass. Triticale can soak up excess nutrients in the soil and then slowly release them as the plant material breaks down. This grass provides good erosion control and works as a natural trellis with climbing legumes like hairy vetch. Because triticale is grown on a large scale as a cereal grain, it’s a very affordable component of a cover crop mix.

Hairy vetch

Hairy-Vetch.jpg

This legume species can replace nitrogen fertilizers in a garden. Vetch fixes nitrogen from the air into readily available mineralized nitrogen. Its vigorous growth helps to smother weeds, and its roots condition soil so that it can soak up and hold more moisture from snowmelt and rain. Unlike oats and triticale, vetch has a high nitrogen to carbon ratio, so it breaks down quickly and completely in soil once it has been terminated by cold temperatures, mulching, or tilling. Vetch will climb up stalks of oats and triticale while its nitrogen production enhances the growth of those grass species. The USDA rates vetch as hardy to Zone 3 (much of the Gunnison Valley is classified as Zones 3 and 4), so some plants may survive the winter especially if they are sheltered by snow.

 Red clover

Red-Clover.png

Many legumes produce more nitrogen and biomass than red clover, but no other pea family cover crop species is adapted to as many climates and soil types. This species is dependable and low cost. It grows as a biennial, short lived perennial or annual depending on the species variety and the extent to which it’s sheltered during winter. Red clover compliments oats and triticale, and red clover produces more usable nitrogen in soil when planted with those grass species. The taproot can penetrate soil several feet deep, so red clover works as a great soil conditioner. Red clover has been used as a cover crop in North America since European farmers arrived with it in the 1500’s.

There are many other species worth considering as cover crops in the Gunnison Valley. Annual rye, buckwheat and common flax are just a few. Farmers and gardeners across North America are waking up to the value of cover crops after nearly a century of neglecting these useful plants in favor of synthetic herbicides and fertilizers. There are now many cover crop seed suppliers to choose from and a vast body of research about how to use them most effectively. The future of food production, both large and small, looks to be covered in cover crop.

Succesion Planting

I feel like it goes without saying that the Gunnison Valley is a hard place to grow. With a 90 day growing season, mid summer frosts that can hit us any time of the year, and the hot high altitude sun, gardening here can sometimes feel impossible. But none the less we plant on, and are actually able to grow some things. Given the difficulty of this endeavor, it is important that we make the most out of our growing spaces for the short growing season. One of the best ways to do this is with succession planting. 

Putting it simply, succession planting is when you plant something in your garden in the same spot that you just harvested something from. The main perk of succession planting is it will allow you to harvest from your garden for the entire growing season as opposed to a few big harvests. Succession planting is common place for anyone growing food commercially. Because of this, I reached out to the Mountain Roots farm team to learn a little bit about what we do for succession planting at our farm.

IMG_2093.jpg

Tip 1 Germination rates and days to maturity 

As soon as I posed this question to them, Lexi, our Sustainable Agriculture Lead immediately told me to look at germination rates, and days to maturity to see if doing a succession planting is viable. For example, radishes (depending on the variety) can mature in as little as 3 weeks. So in theory you could harvest three to four rounds of radishes from the same bed throughout the season. In contrast, broccoli can take 50-80 days to mature (starting from a trans plant) making it not a viable option for succession planting here in the valley. Checking the days to maturity of the plants in your garden will let you know what plants you can get second crops out of, and mixing what was planted there can help you make sure that the nutrients of your soil are not depleted, and can help smooth out the gaps in your days to maturity. 


Tip 2 staggered plants

seedlings_beans-683741319-588fd6165f9b5874ee6ee2a5.jpg

One common problem with home gardens is that your harvest can feel like a feast or famine situation, where nothing is ready for a while, they you turn around and have more kale than you know what to do with. One solution to this could be another technique of succession planting, which is staggering your planting. The practice of staggering your planting is a simple one. Instead of simply planting all of your seeds at one time, you plant some of them every week. This way your harvests will be staggered by a week. Your harvests can be as staggered as you would like them to be. For any lettuces or arugula, I would recommend having two sections going a week apart. This way you can go in and do a haircut-style harvest on one section a week since it takes two weeks for these greens to bounce back after this type of harvest. 

Tip 3. Over Wintering.

garlic-in-snow-2x.jpg

Over wintering plant can be difficult in the Gunnison Valley, but it is possible. Looking at what plants you are wanting to over winter can help you plan your beds for the next season. For example if you over winter garlic, it will be ready to harvest in late July early August. This gives you a small window for growing either some baby greens or radishes in the same bed that you pull the garlic out of.

Tip 4  Cover crop.

weed6-2etnbpg.jpg

Cover crops are crops that are planted but not intended to be harvested. Cover crops have a variety of benefits including, water retention, soil nutrition, compost filler, and reduce pests, and weeds. There are a variety of plants that work as cover crops. One of the best cover crops though is legumes. Legumes are a great cover crop because of the nutrients that they bring back into the soil. Lexi informed me that she always plants garden peas in her garden in late summer/fall and lets them over winter. When she is ready for planting in the beds in the spring she just tills the peas straight into the garden soil with some compost. She recommended that every person utilize cover crops in their garden to help with the soil nutrients. 

Succession cropping is something that is easy to do and implement into your garden, but it does require some planning. Juggling the days to maturity with all the plants in your garden can be difficult to do without a garden spreadsheet or a map. Here is an example of something that we used at our farm to help plan our planting. Like most plans though, it changed a bit through the season depending on weather and temperature. This element of succession planting is very personal depending on your organizations style, but I would recommend that you do something for tracking this to help maximize your harvests, or if your the kind of person to just wing it, then look at your days to maturity and go for it. But whatever your approach is, I would recommend doing something for succession planting in order to maximize your harvests throughout the season. 

Water saving tips for getting through the rest of summer.

August is here. The last stretches of summer lie before us, and there is a sense that things have started to shift. There is still plenty of warm days left, but the understanding that this won’t last forever is beginning to sink in. This is undeniably an unorthodox summer, but despite the COVID pandemic, there are certain elements of life that are continuing forward as usual. Two of these being plants and the weather. The thunderstorms of July brought a reprieve from the heat of summer, but as these start to wane, we need to start thinking about how we should best care for our gardens through the heat. Specifically, how do we water them so they get what they need, and we don’t waste any water.

maxresdefault.jpg

Watering our gardens seems like one of the most straightforward chores for our garden, but when we are trying to conserve and make the most out of what water we put into the garden there are some simple techniques that we should follow to ensure that our garden is getting what it needs.

The first thing we should think about is when are we watering? The time of day that you water can make a big difference in the effectiveness of our water. When we are watering our garden we want to avoid evaporation as much as possible. Evaporation is lost water that could have been drunken up by our plants, so we want to avoid it as much as possible. Because of this, we want to avoid watering in the middle of the day, when the sun is out and it is hottest. The best time to water would be in the early morning as the sun is coming up. This way the water can soak into the soil before things get hot, and the plants will have access to it all day. And besides, a cup of coffee and watering the garden is a great way to start the day.

IMG_2044.JPG

If your schedule prohibits you from doing early morning watering, or your just not really a morning person, the second best time of day for watering your garden is in the early evening, when things are just starting to cool off a little bit, but there is still plenty of day light left. If you can’t do either of these, then evening is your next best time. You just want to make sure that you are not watering during the night. Although this seems like it would be a great time, since you could avoid the heat of the day and the evaporation of the sun, there are risks to watering at night. Although we want to avoid evaporation, we also want to avoid standing water. Stagnate water sitting on a plants foliage all night can be an open door for harmful bacteria, and fungi to infect the plant. The same stands true for water sitting on the soil. It can leave the stem and roots of the plants vulnerable to infections. When you water is not the only factor that can make a difference in how efficient your watering is.

Where to water your garden:

tomato-plant-stem.jpg

I feel this goes without saying, but the most efficient way to use your water is to water only where it is needed. With our plants that is on their roots. Now it is true that plants can take up water through the stoma on their leaves, but this is such a small amount of water and it is not worth the waste that we get from the evaporation. Following this idea, we should try to avoid overhead watering, but instead opt for targeted watering at the base of the plant. This can be best achieved with drip tape, or a soaker hose, since these methods distribute the water right at the base of the plants.

Knowing the water needs of your plants will also be helpful with understanding when to water your plants as well as how much water they need. Beyond the basics of understanding low water plants such as Swiss chard or Asparagus, knowing when in their lifecycle they need more water will help with being more efficient with your watering. Though this is different for every plant, a basic rule of thumb that can be followed is that whenever the part of the plant that you are looking to harvest is growing, it will probably benefit from a boost in watering. Tomatoes when they are fruiting out, broccoli when it begins to flower, and carrots when they are rooting out.  This will help the plants with their growth during this time, and help with giving you a more bountiful harvest.

Frequency of watering:

How often, and how long we water will also affect how efficient our watering is. Longer watering periods with less water will be more efficient than a shorter time period with a lot of water. This is because of soils hydrophobic nature. I am sure that we have all experienced this, when trying to water a dry plant, and the water just keeps beading, and running off of the dry soil. This is why smaller amounts of water over a longer time is a more efficient way to get the water to actually soak down into the roots, where it is needed.

16827791768_383d679955_z.jpg

A simple way to check to make sure that moisture is actually penetrating into your soil is to stick a finger into the soil and feel how far down the moisture goes. This will help to give you a feel for how effective your watering is. Getting the water into the soil is only half of the battle, once it is saturated, we need to keep the water in the soil.

MultiCompost01.jpg

Keeping the water in your soil:

There is a couple of techniques for retaining water in your garden, and fortunately they all have other benefits for your garden as well. The easiest way to keep water in your soil is to apply mulch to the top of your garden. Applying at least an inch of mulch over your garden will help stop the moisture from evaporating off of the soil. When it comes to mulch, your options are pretty open. Wood-chips, straw, cardboard, fallen leaves and yard trimmings all make good mulch. But mulch is not the only organic matter that will help your soil retain water. Having a good mix of organic matter in your soil in the form of compost will help your soil retain water. This is because moisture evaporates out of dirt easier if there is no organic matter for it to soak into. This also has the benefit of ensuring that your plants are getting the nutrients that they need.

bulk-mulch-garden-center-nursery-yard-21.jpg

The summer heat is an amazing time for rapid growth in our gardens and is also a nice reprieve from the cold we experience in the valley for most of the year. However, it doesn’t come without it’s challenges. But this shouldn’t be a problem for you if you,

1) make sure to water in the early morning or evening when the water won’t evaporate off to quickly,

2) water strategically at the base of the plant where it is needed,

3) water in longer time intervals with lower intensity so that the water really gets to soak into the soil and not run off, and

4) make sure that there is plenty of organic matter in your soil and mulch on top of your soil so that once the moisture is in there, it doesn’t evaporate off.

If you follow all of these steps, then you should be able to make much more efficient use of your water for the rest of the summer.

Compost Tea

Compost tea has been hailed as the magic elixir that makes plants grow stronger, ripen faster, taste better, run farther, and jump higher
— Nicole Faires, urban farmer.

Compost tea is a name that gets thrown around a lot when talking to gardeners. It can bring a certain coffee shop vibe into the garden when conversations switch from pests and seed germinations to strengths of brews and step times, but what is compost tea? Simply speaking, compost tea is a liquid mixture of compost in water, making the nutrients of the compost more available for the plants. Though this description is not wrong, it is a bit of an over simplification for what is actually going on in compost tea. 

Firstly the term tea can be misleading for compost tea. Though you do brew it in a similar way to tea, with a large tea bag (usually a sock or shirt) steeped in water to infuse the water with elements of the “tea” in this case the compost, compost tea behaves more like brewing beer or making a sourdough starter. That is because what is really going on in the compost tea is closer to a fermentation. Compost tea create a complex microbiome of thousands of bacteria, fungi, and nematodes. Just like in our own bodies these microbes are essential for the plants growth and its ability to absorb nutrients. So how do we get this microbiome into our compost team?

compostworms.jpg

Fortunately for us, all of the work of inoculating our compost tea with cultures of healthy microbes has already been done by our compost, or worm castings, so our job is to make sure that these we create a healthy environment that these microbes can thrive in.

As I mentioned above there are different levels of complexity with how you brew your compost tea, but whether you want to go as simple as mixing compost and water into a bucket, or you want to go all the way to using an aerator and fish meal, the first and most important step of compost tea is the same for how ever you do it.

chlorine-1300x870.jpg

The first step with compost tea is to make sure that you are working with chlorine free water, so that you are not killing any of the microbes that we are trying encourage. If you are getting your water from somewhere other than the tap like rain water, or from the ditch, this isn’t an issue. However if you are getting your water from the tap, or any potable source, then your water has chlorine in it. The two simple ways to get rid of chlorine in water are to either let it sit in the open for 24 hours, and the chlorine will burn off. Or if you don’t want to let it sit for 24 hours vitamins C powder can be added, because the abzorbic acid in it will neutralize the chlorine in about 10 minuets. Use about 50 milligrams per liter of water to neutralize the chlorine. This method is also beneficial because the vitamins C is also a beneficial nutrient to the plants. 

Aerated vs non-aerated

th (2).jpeg

Non-aerated

The biggest distinction between the two types of compost tea is whether or not there is an aeration system. This can be an important aspect to compost tea because all of the beneficial microbes that we are trying to grow in the tea are aerobic, meaning that they need oxygen to survive. Which is incredibly important, because if the compost tea goes anaerobic, then harmful bacteria such as e-coli will take over your compost tea. This is not to say that the only way to safely brew compost tea is to use an aerator. Just if you choose not to use an aerator, make sure that you are not over brewing your tea. There will only be enough suspended oxygen in the water for approximately 24 hours, so this can be a great method if you are wanting to do a quick and simple brew. Just be sure to follow your nose with this one, and if the compost tea is smelling bad, then it has gone anaerobic, and shouldn’t be put on your plants. A recipe for this simple brew could be as easy as 

  • 5 gallons of chlorine free water

  • 1-2 cups finished compost (or worm castings)

  • 5 gallon bucket 

  • Nylon sock or pillow case to act as tea bag. 

th (4).jpeg

Aerated

If you are looking for a bit longer brew time, or want to get a little more fancy with the microbes that you are growing, then you are going to need an aeration system. The easiest option for aeration would be an aerator for a fish tank. The kind with the porous stone at the end of it that the air gets pumped through are great at introducing oxygen into the water. These will allow your compost tea to brew for a longer time, and produce more microbes without going anaerobic. But going anaerobic is not the only concern with longer brewing times. 

th (1).jpeg

A longer brew time opens the door up to a plethora of benefits, as well as problems. To simply put it, more microbes more problems. The benefits of doing a longer brew is that your compost tea will have more microbes in it, and the cultures can be healthier, but more healthy microbes are going to require more resources. When doing an aerated compost tea, it is important to feed the microbes. In the more basic set up, there is enough food in the compost for these microbes to munch on for the time while they are brewing, but extending that brew time with an aerator is going to leave them hungry. Supplementing your compost tea with  food for these microbes is easy. Bacteria need simple sugars to feed on. This can be done with unsulphured molasses, or really any simple sugar. The fungi in the compost tea are a little more tricky, and require complex sugars. These complex sugars can be found find in liquid kelp, or fish fertilizer, these make great additions to your compost tea. Here is a recipe if you are looking to do something a bit more involved with your compost tea

Do you want to grow large, healthy, productive, disease & pest resistant plants? Then you've come to the right place! Compost tea is chock full of plant nutr...

  • 5 gallons of chlorine free water

  • Two cups of compost 

  • One tablespoon unsulferd molasses 

  • One tablespoon organic liquid kelp fertilizer 

  • One teaspoon organic liquid fish fertilizer  

  • A bag for the compost (something like a sock or a pillow case) 

  • Utilizing compost tea

Now that you’ve got a fresh batch of dank compost tea what do you do with it? Compost tea is a liquid fertilizer, so it has a very straight forward application process. You water your plants with it. Well, it is a bit more complicated than that. Depending on who you ask, your compost tea can either be put directly onto your plants, or it needs to be diluted up to a 10:1 mixture. A lot of this depends on how concentrated your compost tea is. I would recommend beginning with a 4:1 or 5:1 ration to make sure that you do not burn your plants. Though nutrient burning your plants with compost tea is difficult, it is not impossible. Starting with a diluted compost tea, then experimenting with your ratios will be a good way to insure that you get max nutrition without the burn. Watering your plants bi-weekly with the compost tea mixture will help to facilitate the growth of your garden, and the compost tea can be applied to the foliage as well

It can be tricky right off the bat to see if your compost tea is working. Considering most of us don’t have 400x magnified glasses we cannot see what microbes are swimming around in our tea. It will take a couple applications at least to begin to notice any difference, But I would recommend doing some side by side comparisons to see the differences for yourself. 

6.6_vegetable-garden_body-2.jpg

The Nourishment Our Soils Need.

A nation that destroys its soils destroys itself.
— Franklin D. Roosevelt

     It’s crazy to think that the 4th is already behind us. July is here. The snow in the high country is retreating, hill sides are starting to take on a purple coloring as the Lupines come in, Crested Butte is filled to the brim with summer tourists, and many of us gardeners are starting to taste the early fruits of our labor. Lettuce and spinach are coming in. The first round of radishes are getting ready to come out of the ground, and our gardens are starting to really fill out with happy vegetables, but let’s make sure that they are staying happy. If you have not already thought about fertilizing your garden, you should, and if you have thought about it, you might want to think about how you are fertilizing it.

e9de2c_52f417942344458586fbecdac1413b2b_mv2_d_6865_4582_s_4_2.jpg

Soil is one of the most amazing things that there is on this planet. More than just mere dirt, soil is a world of its own, and the world that our world is built on. Just 1 teaspoon of soil can have over 6 billion microbes living in it. The complexity of this world can be donting, but soil health is just as if not more important than fertilizer for plants. To help bring some focus to this microscopic world, I talked to Adrain Fielder, the man who first introduced me to the massive world of microbes. 

iStock-638757328_2.jpg

Adrain is the Assistant Dean of Instruction at Colorado Mountain Colleges Carbondale campus. When I was studying there, Adrain opened my eyes to the vast world of Microbes. After I called him up and told him about the Victory Garden Revival, the first question that he ha for me was about what I am telling my gardeners to use to fertilize there gardens. He then discussed with me multiple practices that he teaches in his permaculture class to create thriving symbiotic relationships between plants and the soil. 

IMG_5634.jpg

Dynamic Accumulators

The first topic that we discussed was dynamic accumulators. Dynamic accumulators are a group of plants that have a deep tap root that brings up minerals from deep in the soil up the surface. At first this sounds like it might be problematic, that these plants are depleting your garden of its nutrients, but they are not. The dynamic accumulator engage in a process that is called phytoaccumulation, or the collection of metals in plants. As the dynamic accumulators suck up the minerals from deep in the soil, they bring them into their own biomass, that then can be used as compost or mulch to release these minerals back into the shallow soil.

Many dynamic accumulators can make great compost tea by submerging them in air rated water for a week or two. Compost filler, by adding bulk (and nutrients) to your compost, and chop and drop compost, or mulch by just simply chopping them up, and scattering them around the garden. Be carful not to do this with the roots, because many dynamic accumulators spread through their roots. Here you can learn more about dynamic accumulators, and a list to learn more about them.

mature_plants_july2.jpg

Legumes

Another plant that was a topic of discussion was legumes. Legumes are a magical family of plants that include beans, peas, lentils, and some nuts. The reason that Legumes are so fantastic, is because they are one of the few species of plants that put nitrogen back into the soil. Despite nitrogen making up over 70% of the atmosphere, nitrogen is actually a hard nutrient for plants to get, sense they can only use nitrogen in the form of NH4, not nitrogen in its gasses state. But Legumes have found the work around in the form of Rhizobium bacteria. A bacteria that lives in the legumes root structure that converts gasses nitrogen into NH4. This symbiotic relationship is great for the bacteria, the legumes, and any other plants near by.

  This is why Adrain told me that he surrounds every plant he plants with a circle of pea seeds. As these peas grow, he will chop them down so that they don’t compete with the main plant that you are wanting to grow. He said that this he does not care about the growth of the pea plant above ground, as much as he cares about its root structure growing down, and introducing the Rhizobium bacteria into the soil. He also informed me that a trick he uses to save some expense is he will buy dried peas in bulk from the grocery store. Because a pea seed is a pea seed whether it comes from a seed pouch or a bulk bin. 

image-7770-full.jpg

Mycorrhiza Fungi

Mycorrhiza fungi was the last topic of our discussion. Mycorrhiza fungi, are fungi that live within the root structure of plants. Like the fiber optic cables that build the internet, the mycelium of the Mycorrhiza connect the plant roots together in a web of shared nutrients and water between the plants. If you were to look at soil as a living organism, the Mycorrhiza would be the vanes that connect everything. Similar to the rhizobium bacteria that live in the roots of the legumes, the mycorrhiza live within the root structures of the plants, and extend out into the soil. In exchange for room and board in the plant’s roots, the mycorrhiza provide the plant with nutrients, by extending the reach of the plants roots, as well as breaking down organic matter in the soil into a usable form for the plant. 

mycorrhiza-shop.jpg

Adrian informed me that when ever he is planting anything he will always dust the roots of it in Mycorrhiza powder, that you can get at any gardening store. This will help foster the symbiotic relationship between the plants and the fungi. to the Don’t worry if you forgot to do this at the beginning of the season, or this is your first time hearing of this. There are still excellent ways that you can introduce mycorrhiza into your garden without digging anything up. The best way that I would recommend doing this is to coat some pea seeds with the mycorrhiza and plant them next to your other plants. this way you are getting the benefits of both the legumes and the mycorrhiza. another way that you can do this is to add the mycorrhiza powder to some compost tea right before you water your plants with it. You don’t want to add the mycorrhiza until right before the watering, because the spores can drown if left in the water for too long. Both of these techniques will help to the spores of the mycorrhiza down to where they can bind to the plants roots, and start growing.

These are just a handful of techniques used in permaculture to increase nutrients in the soil. There are a variety of benefits to these vs traditional fertilizer that I will not go to deep into her. There will be another blog post looking at that problem, but one that I will talk about here is what is called burning your plants. Like medicine for people the helpful properties of fertilizers comes down to the dose. Too little and it does nothing, too much and it becomes poisons to the plants. It can be easy to turn your concentrated fertilizer into a poison for your plants if you are not careful, but with all of the techniques that I mentioned above, it is impossible to over due them. These techniques also add to the biodiversity of your soil, and the over health of your garden. 

Permac1.jpg

I understand that this blog post flew through a bunch of information. Please if you feel like you need clarification on any of this don’t hesitate to reach out to me.  Sean@mountainrootsfoodproject.org

Food Insecurity

FoodInsecurity2.jpg

The knowledge that there are hungry people in the world is nothing new to most of us. Some iteration of the statement “Finish your dinner. There are hungry children in Africa who would love that food” is so common to hear that it has become a joke in our society. How have we as a society become so disconnected from a human experience so basic as hunger, that it has be come a bad cliche? There are a multiple reasons why so many of us are disconnected from food insecurity, including a lack of understanding of what food insecurity is, and where we find it. 


Hearing the term food insecurity brings to mind the image of great depression styled soup lines, empty kitchen cubers, and hungry children. Though unfortunately this is the reality for some food insecure households, This is not an accurate picture of food insecurity. Food insecurity is different from hunger. Hunger is an individual physiological condition caused by a lack of food, but food insecurity is a systemic issue caused by inequality within our society. The USDA defines food insecurity as 

A household-level economic and social condition of limited or uncertain access to adequate food.
— USDA

Adequate food is the key element of this definition. There’s enough food being grown in this country for everyone. Everyday 2,700 calories of food per person are harvested across the world.  Exceeding the 2,000 calorie threshold that most adults need to eat to maintain regular body function. There is not a shortage of calories. We face a deficit in nutrition and equal distribution. 

th.jpeg

Empty calories in the form of processed foods are filling our nation, and leaving us hungry, nutrition deficient, and more susceptible to diseases. With 37.2 million Americans living in food insecure households, this is a serious problem within our country. An issue that hides under an untrue perception of food insecurity. Only 25% of food insecure households report not eating for a day or more because of lack of food. However, 96% of food insecure households say that they can not eat balanced meals because of lack of money. The lack of nutrition has serious ramifications for our country. One of these is the health ramifications of this. Food insecurity is linked to increases in: diabetes, heart desires, cancer, obesity, negative effects on mental and physical health, asthma, depression, high blood pressure, as well as a general susceptibility to all sicknesses. Along with these health risks comes an academic risk that could have rippling effects throughout our society that will be felt for generations. Children growing up in food insecure houses often have a harder time focusing in school, and act out more frequently. The ramifications of food insecurity are those of stress, anxiety, poor health, loss of academic achievement, and a sense of insecurity in all aspects of life, more than they are hunger. This different framing needs to be adopted to realize the extent of food insecurity in our nation. We also need to look into our own backyards to realize how close this issue is to home.

When thinking of the hungry, the notions that come to mind of developing nations, and soup kitchens blind us to the reality we see in our own communities. This is not to say that the food security discrepancy between developed nations and the developing world is not an issue, but to look at this as the only issue of food security hides the insecurity that we have in our own backyards. The Gunnison valley has the feel of an isolated mountain community. It is easy for us to choose to disengage from the outside world if we want to. To imagine that problems of the world don’t effect, but they do come creeping in. Food insecurity in particular is problematic for this valley. Currently 40% of school children in Gunnison receiving free or reduced lunches, and the Gunnison Food Pantry is currently serving over 100 people a week. Food insecurity is very much present within the Gunnison Valley. Fortunately this is an issue that is not going uncontested. The Emergency Food Network has been created to combat food insecurity. You can find the list of members of this network in the Gunnison Times, as well as the CB News. The current list is:

  • Pandemic Response team 

    Delivery service from grocers, pharmacies, and Food Pantry for

    Gunnison County residents; call Assistance Hotline 970-641-7959

  • Dept. of Health and Human Services

    Public assistance for citizens who qualify; call 970-641-3244

  •  Gunnison Watershed School District

    Grab-and-go sack breakfasts and lunches for children 18 and

    younger; pickups M-F 8-9 in Gunnison and CB and delivery routes; Gunnisonschools.net/lunch menu

  • Gunnison County Food Pantry

    Gunnison Pantry on SW corner of Main & Ohio

    M 1-4, W 1-7, Th 10-2 for 60+

  • Crested Butte Pantry at Oh Be Joyful Church

    Th 4:30-6 Emergency Food at 30 locations around county for anyone-in-need; Gunnisoncountryfoodpantry.org

  •  Mountain Roots Food Project

    Free Market Produce Stand for anyone Mon 4:30-6 at 515 S Main, Bills Giving Park. Tue 4:30-6 at Totem Pole park, 4:30-6 at the CB south bus station

  •  Immigrantes Unides

    Financial aid for immigrants-in-need; call 888-540-4858

  •  Young at Heart

    Lunches M/W/F Noon; delivery for homebound Adults 60+;

    financial assistance available; call 970-641-2107

  •  Living Journeys 

    Meal deliveries for cancer patents

All of these organizations are banning together to support our valley, and they could all use help. If you are interested in helping, all of these organizations would be happy to have the extra support. Together we can work to support our valley through these hard times.