America’s Service Commissions Highlights Mountain Roots

Mountain Roots Healthy Futures AmeriCorps member, staff member, and volunteer help hand out food.

Mountain Roots Healthy Futures AmeriCorps member, staff member, and volunteer help hand out food.

On March 11, 2021, America’s Service Commissions released its new publication, Innovative State Service COVID-19 Response Programs, as a testament to the hard work and perseverance that AmeriCorps programs and AmeriCorps members have demonstrated this past year since the impact of the COVID-19 pandemic first became evident in the United States and shutdowns began.

 The publication features 79 innovative programs from 50 states and territories and represents a glimpse into the impressive work of national service programs this past year and the extraordinary efforts of AmeriCorps and volunteer programs to aid those most in need in hyper-local ways. The Mountain Roots Healthy Futures AmeriCorps Program was the first of two Colorado service programs highlighted for the immediate shift our members took to provide our communities with critical information on COVID-19 testing, symptoms, and public health measures. Members offered their skills to contact tracing, community event planning, call centers, and emergency food relief efforts. “It all seemed surreal,” stated Healthy Futures Program Director Lyndie Kenlon. “Our members had just started their service, and suddenly everything they thought they would be doing changed. They had to pivot, carefully navigate social lives to accommodate direct service, and they leaned in and dug deep.”

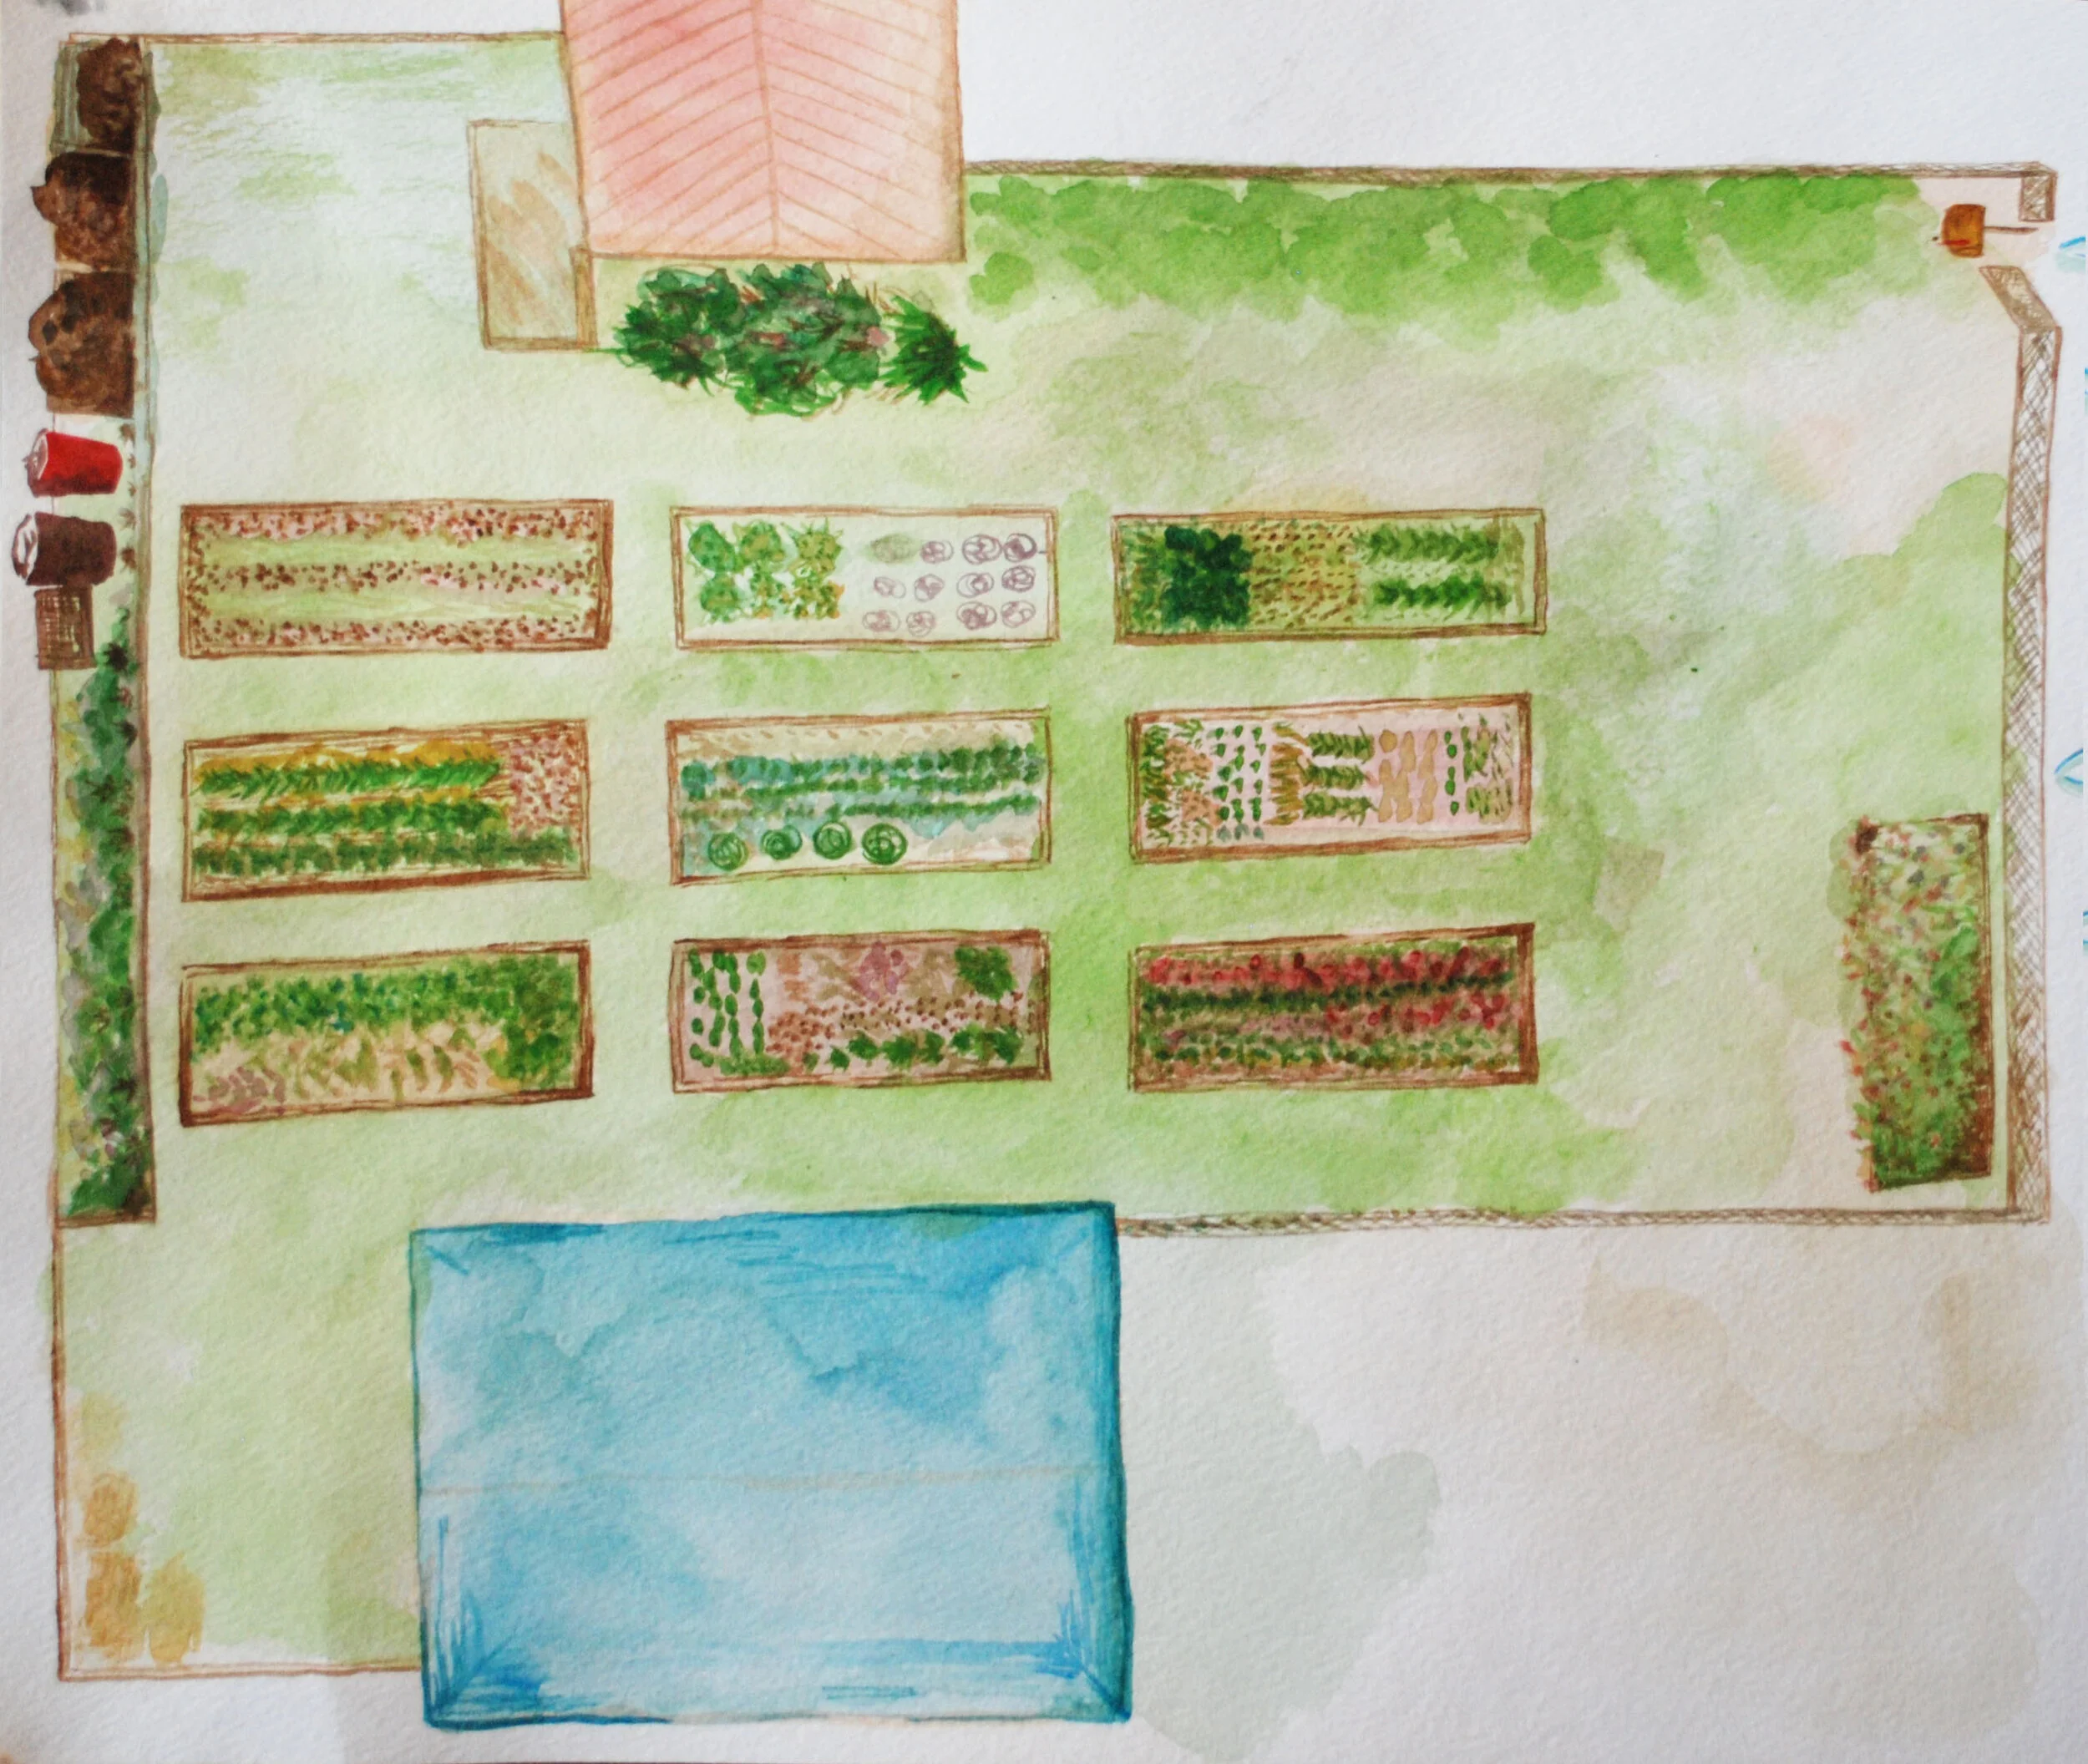
Mountain Roots Healthy Futures attracts members who are looking for experiences that inspire, build on their passions, and positions they see where they can make a change in themselves and for others. Members annually uproot their lives to provide service to communities across Gunnison county. Many are coming to experience Western culture, rural communities, and serving others. Service has changed forever. Mountain Roots Healthy Futures has changed forever. The pandemic experience provided unique opportunities for leaders to shift services to support the most relevant need for those most negatively impacted. Members followed these leaders and ‘Got things done’ for rural Colorado.

Overwintering Compost

One of my favorite things about having a home garden is that it helps increase your self-sufficiency, and not just with the food that you grow. Another great benefit to a home garden is that it helps to close off part of your waste stream. Having a home garden makes it significantly easier to compost all of your food scraps right in your back yard. This is just one of many great perks that come with gardening. Unfortunately, once the temperatures cool down and the snow starts falling, many of us put our gardening on pause along with all of the benefits that come with it. We return to buying produce from the grocery store and have to settle for our house plants being the only green things around us. But what does this mean for our food scraps, do we go back to throwing them in the trash? Or can we keep benefiting from our compost piles all winter long.

compost-winter.jpg

Composting through the winter is already a tricky thing to manage. Add the frigid temperatures of a Gunnison Valley winter to the equation and overwintering your compost might seem like an impossible task, but it can be done. Calder farms is able to keep their compost cooking at 160˚F through the winter. Here are some of their tips and tricks that they use to help keep compost going through the winter.

The most important thing to keep in mind is that your compost pile is alive, and like most living things, it produces its own heat through metabolic processes. So the more metabolic processes going on, the more heat your compost will create. This is why at Calder farms they pay special attention to their compost pile throughout the winter, ensuring that it is as healthy as it can be to avoid freezing during the winter.

Composting-in-the-Winter-1024x683.jpeg

It can be easy to just throw some scraps into your compost, and let it do its thing during the summer, but during winter you need to be much more attentive to the needs of your compost. Make sure you have a good ration of browns to greens. Browns refers to the bulk carbon that is added to compost. This can be leaves, straw, wood chips, pretty much anything that is decomposable and full of carbon. The greens refer to things that are high in nitrogen. This includes food scraps, or fresh clippings etc. You’ll want to maintain a ratio of around 30:1 browns to greens. This is a rough estimate, because it is difficult to know the exact ration of carbon to nitrogen in everything that you put into your compost, so don’t get to hung up on this number. Instead just observe your compost, and make adjustments based on what you are seeing (and smelling).

Browns-and-Greens.jpg

You will want to pay close attention to this ratio in the winter, because you should start adding more brown to soak up the extra moisture, and provide more insulation. You will likely need to add some extra green as well to make sure you keep a healthy ratio.

If your compost doesn’t seem to be breaking things down as fast as it should, you might have too much brown in your compost and you should increase the amount of green in your compost.  If your compost pile is starting to smell bad, this indicates that your compost has maybe gone anaerobic, this can be caused by having too much water and or green in your compost. In this case you will want to stir your compost a little, and add some brown if it looks too wet.

Another thing that could help give your compost a leg up in the winter is to chop up your food scraps into smaller pieces. Since the organisms that break down the food are microscopic, the smaller these food scraps are, the faster they will break down. Keeping your compost happy and productive is crucial to having it continue to cook over winter, but it is not the only thing that you can do to help out your compost.

004.JPG

Keeping your compost going through the winter is all about keeping it warm. Now it will generate its own heat, but you can keep this heat in with insolation, and you can siphon some free heat off of the sun as well. It is easy to keep your compost pile insulated. You can do this by surrounding the whole thing with straw, bags of leaves, it doesn’t really matter. You just want to make sure that you can keep in the heat that it is producing.

Helping your compost absorb some free heat from the sun can also be very helpful, and simple. At Calder farms, they cover their compost with a black tarp. They also mentioned that creating a cold frame or moving your compost into a hoop house type structure can help provide the extra warmth that is needed to keep it cooking year round. And if you do not have the space or resources to keep your compost pile going year round, Calder farms has a bin in front of their farm for dropping off food scraps. This will insure that you can dispose of your food scraps properly through the winter, even if you can’t compost them yourself.

Composting5 jpg.jpg

Gardening in Gunnison is difficult for a myriad of reasons, keeping your compost going is just one of these. The average amount of time that it takes for something to break down in a backyard compost pile is just about as long as our whole growing season here, so you need to be able to extend the life of your compost at least a little bit, to really get good use out of it. Regardless of whether you are actually able to keep your compost cooking over the winter, it is worth trying. The worst case scenario is that it freezes, and then starts cooking again in the spring. I have spoken to many gardeners who continue to put food scraps on their compost throughout the winter regardless of whether it is cooking or not, so why not give it a go.

Garden Planing

Well here we are at the end of the season. The last crops have been harvested, the garlic is in the ground waiting to pop up next spring, and our gardens have been put to bed for the winter. For many of us the growing season has come to an end. But this does not mean it’s time for us to hang up our sun-hats and put our gardens out of mind until next spring. No, now is the best time to reflect on this year. What went well, what could be improved on, and what you want to incorporate into next year, and use this to help plan for next season. Here are some things that you will want to keep in mind and some techniques you might want to try when planning your garden for next season.

  The first question to ask yourself when planning for next season, is whether you want to expand your growing space. If you are looking to expand your growing space, there are a couple things that you want to keep in mind. Do you want to build a raised bed, or do in-ground rows, and where do you want it to be? Both of these growing spaces have their advantages and disadvantages.

IMG_2312.jpg

Raised bed.

Raised beds are a very popular type of growing space for home gardeners. There are multiple advantage and disadvantages that raised beds have.

Advantages

o   Weed management is much easier with a raised bed

o   The soil warms up faster in the spring

o   They are easier to build added infrastructure like hoop houses and cold frames on

o   They can be built up higher to limit bending down (this also helps limit pests)

Disadvantages

o   They are more costly to install than in ground beds

o   They can have problems with drainage if there not built properly

DSC_1408.jpg

 In ground beds.            

In ground beds are what they sound like. They are a growing space consisting of a cleared out section of ground where crops can be planted. Like Raised beds these come with advantages and disadvantages

Advantages

o   You don’t have to worry about drainage

o   They are more cost effective

o   They are more flexible with where they can be put.

o   They can be easily expanded

Disadvantages

o   Weed management is much harder

o   It can be more labor intensive to create ground beds.

o   The soil will take longer to warm up in the spring.

o    It can be harder to keep pests away

The Right Location

DSC_1502.jpg

Regardless of which growing space you go with, raised beds, or in ground beds, there are a couple things that you want to keep in mind for where you put them. For your new growing location you want to avoid windy spots. This wind can damage plants, chill your garden, and increase evaporation, drying out your garden. You also want to make sure and avoid shaded areas to ensure that your plants get enough sunlight. Most vegetable crop require between 6-8 hours of direct sunlight. Make sure you know how you are getting water to your garden. Avoid low areas or depressions in your property. Cold air will sink down into these depressions. creating a microclimate that is colder than the rest of your property. You also want to avoid locations where snow piles up. These piles of snow will take longer to melt, and will mean that you get an even later start to your growing season

What Garden to Plan For

Whether you are looking to expand your growing spaces, or just looking to improve your current growing spaces, creating a garden plan is extremely beneficial for improving yield. When making your garden plan, you really want to think about what kind of garden you want to have. You’ll want to ask yourself some questions to know what you want out of your garden. You’ll want to know how much money you want to spend on materials for your garden. How much time will you have to give to your garden? How much produce do you want to harvest from your garden? And what produce will you actually eat? Once you know the answer to these questions, it can be much easier to know what to plan for.

CottonwoodMap.jpg

  Basics for Planing Your to Planting

Regardless of what you want out of your garden, there are a couple basic things that you want to keep in mind. The first one of these is where is the sun coming from. You want to make sure that your tall plants are not shading your short plants. You also want to rotate where crops are growing in your garden . Growing the same vegetable season after season in the same spot can lead to nutrient depletion in the soil, and the buildup of species specific illnesses in one area of your garden. Another thing to keep in mind is that airflow is your friend. Whether you are doing bio-intensive, block style planting, or just winging it, make sure you have enough space between your plants. There is a spacing chart below. If there is not enough air flow, this can cause pests and fungi to move in and make your plants sick.

  With these basics in mind, you need to decide what you are going to be planting and where it is going to go in your garden. Luckily like many things with your garden, this is up to you, and there are almost no wrong ways to do it. I’m going to give a brief overview of some different techniques that can help with improving yield in your garden, and understanding what to put where.

DSC_1500.jpg

One basic technique is to group your veggies by similarity. This could be either days to harvest, or plant needs. Grouping plants by days to harvest, means that you will be harvesting from one location in your garden at a time. This will make it easy to keep track of what to harvest, and can be a good first step with succession planting.

Grouping plants based off of similar need will make it easy to care for your plants in the way that they need to be cared for. Unfortunately, your plants will most likely be competing for these resources, but this can be a good technique for new gardeners because it is easier then juggling all of your plant’s needs across your whole garden.

If you are looking to get a little more advanced with your gardening, you could try implementing block planting, succession planting, or partner planting. Or you could attempt some combination of all of these techniques.

IMG_0161+%281%29.jpg

 Block Style planting.

Block style planting is a form of bio-intensive planting that bases plant spacing off of blocks instead of rows. This style of planting works very well for home gardens growing in raised beds, because it is based off of 3-4 food wide blocks that have walk ways on either side of them. These blocks can be place one next to each other to fill up an entire raised bed. The bio-intensive nature of block style planting is beneficial for both increased yield out of a small space, as well as decreasing the amount of weeds in the garden. When doing block style planting, it is important to still follow spacing guides. Here is a more detailed explanation of block style planting from the CSU grow and give website

Suggested spacing for kitchen garden vegetables: with diagram of block planting (Start with the wider spacings, reducing spacing with experience and as soil improves in fertility and tilth.)

Screen Shot 2020-10-27 at 11.46.36 AM.png
  • Beets: 4-6” by 4-6"

  • Carrots: 2-3" by 2-3"

  • Celery: 7-9" by 7-9"

  • Garlic: 4-6” by 4-6"

  • Kohlrabi: 7-9" by 7-9"

  • Leeks: 4-6” by 4-6"

  • Lettuce, head: l0-l2” by 10-12"

  • Lettuce, leaf: 7-9" by 7-9"

  • Onions, bunching” 2-3" by 2-3"

  • Onions, dry: 4-6" by 4-6”

  • Parsnips: 5-6” by 5-6"

  • Radishes: 2-3" by 2-3"

  • Spinach: 4-6” by 4-6”

  • Swiss chard: 7-9” by 7-9”

  • Turnips: 4-6”by 4-6"

  • Brassicas (broccoli, cabbage, Brussels sprouts and cauliflower) 18”-18”

  • Potatoes: 12-15”-12-15”

 Succession planting

            Succession planting is the technique of staggering your planting based on days to maturity in order to maximize your harvest, and ensure that you are always harvesting something. The key to succession planting is looking at days to maturity of all of your crops and fitting them together like a puzzle to ensure that you get the most yield out of your garden. An example of this could be planting radishes all around your broccoli. By the time that your broccoli is big, you will have already harvested your radishes. An easy way to plan your succession planting is to create multiple garden diagrams on a time scale. Create a garden map for each month of the growing season, and track the days to maturity to see when things will be growing, and when things will be done growing.

Note in the diagram below how in the first month radishes are at the top of the middle bed, but a month later this has been switched to carrots. That is because by the second month the radishes have been harvested, and this is now an open part of the garden. This timeframe planning can help piece together the puzzle of succession planting. If you are looking for more information of this planting technique you can check out Mountain Roots blog about succession planting here.

 companion planting  

            Companion planting is another popular technique for planning a garden. Companion planting is the concept that there are certain plants that benefit each other when planted together. Probably the most famous example of this is the Three Sisters utilized by many Native American Tribes. The beans, squash, and corn, all provide something for the other plants, and together they all grow healthier.

Companion-Planting-Chart.jpg

There are countless examples of companion planting, and ways that companion planting can benefit your garden. Companion planting can be beneficial by deterring pests, attracting beneficial insects, fixing nutrients in the soil, providing a beneficial environment for your plants, and can help with weed suppression to name a few. Like many things in your garden, it is not an exact science. There is a lot of trial and error that comes with succession planting, but there are some do's and don’ts that you can follow. Plants that have similar needs as far as nutrients, sunlight, space above and below ground are a no no for companion planting. As well as planting anything in the allium family (onions, garlic, leeks) next to legumes. the alliums. Click on the button below to find a helpful chart with some information on what plants make good neighbors, and what plants don’t. If you are interested in learning more about partner planting you can read up more on the farmer’s almanac here.

Planning a garden for the next season is an exciting thing. It is a creative process that is full of potential. So let your creative side out. Keep a couple of the guidelines above in mind, but go at it. This is your garden. Grow what you want to grow. Experiment a little with it. Create the sanctuary that you want to, and above all, just have fun with it.

Putting Your Garden to Bed for the Winter

  Well the time has finally come. Golden leaves are giving way to barren branches. Our nights are freezing more often than not, and the last warm sunny days are beginning to falter in their protest against the coming cold. It is time to put the gardens to bed for the winter. It can be tempting to let the growing season just fizzle out at the end of the season, but a little bit of effort now will make a world of difference for your garden next season. Closing down a garden space for the season is as much about organizing your growing area as it is prepping the growing spaces for next season. This is also the time when you want to plant any of your fall crops that you plant on over wintering. In the Gunnison Valley, this means garlic.

Why you should put your garden to bed       

            Any wise gardener will scoff at the idea of not putting their garden to bed for winter. There are many benefits that come from properly putting your garden to bed in the fall. Your soil will be healthier at the start of spring, you will have a leg up on the weeds, your gardening equipment will last longer, and it will help you with planning your garden for next season. Let’s talk about garlic before we dive into the steps you should do to make sure your garden is tucked away nice and snug for winter.

DSC_1417.JPG

 Garlic

            Garlic is a great crop to over winter here in the Gunnison valley, this is because it takes garlic 9-10 months to reach maturity. Growing your own garlic is something that is incredibly easy to do. Everyone should have a garlic row in their garden. Plus, nothing compares to the taste of fresh garlic from your own garden. The first thing to do when growing garlic is to make sure you get the right type. There are two main types of garlic, Hardneck and Softneck garlic. Hardneck garlic like the name suggests, has a much harder stalk. Where as, Softneck garlic has a much softer stalk. Hardneck garlic produces smaller bulbs than Softneck garlic, but it is better adapted to colder climates than Softneck garlic. In the Gunnison valley you will want to go with Hardneck garlic. Once you have your the garlic planted, it is very easy.

 Where to get you garlic.

Where you get your garlic is very important, because the quality of the bulb will determine the quality of the plant it grows into. I reached out to Sue Wyman with Gunnison Gardens to ask her what her recommendation would be for where to get garlic. She told me that for the home gardener these are the best places to order garlic bulbs from. Gurneys, Burpees, High Mowing.

She also told me that many people buy garlic bulbs from her at the farmer’s market to go home and plant them. This would be a great option because these plants are already adapted to growing in the Gunnison valley.

It is important that you do not use garlic from the grocery store. These bulbs are treated with preservatives to increase their shelf life. This will make them not grow properly.

Plating garlic.

garlicplanting_rows.jpg

The basic steps below outline the simple process of panting garlic.

  • Break the bulbs apart into individual cloves. Leave the papery husks on them.

  • Plant them 2-4 inches apart, and about 2 inches deep, with the wide root section down, and the pointed section up.

  • Cover them with compost rich soil.

  • Cover the soil with 6-8 inches of mulch

  • Water for 3-4 days after planting. It is important to water your garlic at the beginning so that it gets established before the winter.

IMG_1561.jpg

Putting your Garden to Bed.

            Once your garlic is planted, you can go about putting the rest of your garden to bed.  There are a lot of small steps for preparing your garden for winter, and all of these will be specific to your garden, but all of them lead to the end goal of a tidy space with everything cleaned and put away. Leaving anything out of the winter will leave you with a mess to clean up in the spring. The end goal here is to make sure that everything in your garden is put away neatly. This will also let you know what you need to do to get ready for starting in spring. Here are all of the things that we do at Mountain Roots when putting our gardens to bed.

  •  Make a garden map of what was planted this year. Clearly label all rows, crops and include varieties. This will help you with planning your garden for the next season. Whether you are doing any sort of rotational planting, or looking to change the quantities of what you grew, this information will be helpful.

  •  Remove all annual crops, break into smaller pieces and put into the compost. Any “softer” crops which have not gone to seed may be turned into soil, such as lettuce blends, arugula, peas, etc. With this you want to make sure that any crops you add to your compost are disease free. If you have any diseased crops, you do not want these going into your compost. Don’t worry about removing all of the root structure of these plants. It is better to leave some root structure in the ground than disturb the soil too much.

  •  Remove all weeds! If they go to seed after you close the garden then the garden will turn into a grass patch when we return.

  • Line walkways, and the edges of your beds with Cardboard/newspaper and wood chips to suppress weeds along the outer rows of garden and in isles. This will help suppress any weed growth early next season.

  • DO NOT PUT WEEDS WITH SEEDS IN THE COMPOST! Throw in another area where weeds can grow happily!

  • Water and turn compost. Sift if needed. This will help with getting your fresh food scraps to start breaking down in the winter, and keep pests away from your compost pile.

  • Roll up drip tape, secure roll with blue painter’s tape and label with row number to which is belongs. If your rows are different length, it will be really helpful to know where the tape goes before you have to roll it all out and try to match it to the right beds

  • Remove irrigation manifolds (if applicable) to store for winter. With all irrigation, you want to make sure it is broken down and disconnected so freezing water doesn’t damage anything.

  • Blow out mainlines with air compressor (if applicable). This will help blow out any residual water.

  • Dry frost cloth, fold or roll and label with row number. Get rid of any unusable frost cloth.

  • Turn in soil amendments if necessary – such as compost and/or leaves. Avoid Cottonwood leaves, they are very acidic. For soil amendments in fall, look at last week’s blog. This is an important step for every garden bed that you have.

  • Turn beds. With this step it is important that you disturb the soil as little as possible. Us a broad forking technique to cause as little disturbance as possible.

  • Cutback perennials. Add any extra compost. Mulch if applicable.

  • Cover beds with straw. Mulching the beds will help with protecting the soil biome from deep freezes, as well as limit erosion that will take away your valuable top soil.

  • Plan and plant cover crops when possible. By this point, it is a little late for cover crops, but you might be able to get winter rye established before the ground freezes.

  • Clean and maintain tools. This does not have to be done this day, but take inventory of what tools need to be sharpened, oiled, or de-rusted. These a great winter projects that you will appreciate come spring.

  • Fix fences, latches, etc.

  • Take inventory of supplies.

  • Clean and organize your storage areas (you’ll thank yourself in the spring).

  • Be sure EVERYTHING is winterized. No materials or tools are left out. Everything is put in a home. Anything that is left out will be in poor shape once you find it after all the snow melts.

  • Inventory any left-over seeds.

  • Make a list of “must do” for next year (order new drip tape, get frost cloth, better tomato stakes, etc). Any of these that you can get done in the winter will help you get started earlier next spring.

IMG_3376+%282%29.jpg

  Putting a garden to bed is a bitter sweet thing to do. While it is sad to officially mark the end of your growing season, it can be exciting to start thinking about next season. Putting your garden to bed is a great chance to reflect back on the growing season. A chance to slow down and think about what went well, what you learned, and what you want to try for next year. Many of the steps for putting your garden to bed are fairly easy, but they are very important. A little work here at the end of the season will go a long way to giving you a great start to next season. So get out there before the snow starts falling, and get yourself set up for next year.

The Rhizosphere and Fall Soil

Autumn is a transitional time. Animals are making the last preparations for winter. Squirrels are gathering the last nuts and seeds they can find. The birds have begun migrating. The world around us is transitioning from summer to winter, and we are transitioning with it. I know how it is, once the leaves start falling it’s hard not to start thinking about winter. Preparing for the ski season and the holidays, it is easy to overlook late fall for all of the opportunities it provides. Especially in our gardens. Once the nights start dropping below freezing, and the ditches shut off, it is easy to hang up our shovels until next season, but it is a little too early to put our gardens out of mind. There are many things that you can do for your garden in the fall that will help you out next season. One of the most important of these is soil amendments.

IMG_2225.jpg

  Fall is a great time for soil amendments for a number of reasons. One of these is that through the season your plants have drained the nutrients out of the soil in your garden, so it is important to replenish it before you start to grow new plants in the spring. The other benefit of doing this in the fall vs the spring is that it usually takes a couple months for the nutrients in your compost or fertilizer to fully break down, and become bioavailable. This is because of the relationship between plants and the microbiome of the soil. Before I start talking about the wonderful world of microbes, here are some simple steps to help you amend the soil in your garden. 

Testing Your Soil.

If you are serious about this, the best thing you can do for amending your soil in fall is understanding what your soil needs, and the only way to accomplish this is to get your soil tested. There are multiple home soil testers on the market that work all right, but the easiest way to get your soil tested is to reach out to our CSU extension. Here is a link to the PDF form with all of the information, and the application to get your soil tested http://www.soiltestinglab.colostate.edu/documents/soilsample_horticulture.pdf

IMG_2227.jpg

 Not Testing

If you are not testing your soil, this is completely OK. Even if you don’t test your soil, it is safe to say that your soil will have lost some vital nutrients throughout the season. Though you might not specifically know which ones you lost, these can be replaced with compost.

  A good rule of thumb to follow for amending your soil in the fall is to add about 1-2 inches of compost to maintain your soils organic matter. If you are looking to build your soil you will want to add closer to 3” of compost.

  Once you have added this compost, you do not want to till it in. Tilling is an old farming practice of breaking up the soil to make it easier to work with, but this has been found to disturb the microbiome of the soil, so it is more beneficial to disturb the soil as little as possible. It is a little difficult for us to pull off no till growing in the rocky mountains, so at Mountain Roots we take a minimal tilling approach using a broad fork (https://www.youtube.com/watch?v=V_crd4xGUio) to mix the soil together, but leave as much of the microbiome intact. Once you have mixed in your compost, you want to cover the top of your garden with a couple inches of mulch. This can be hay, stray, leaves, whatever. This mulch is designed to help insulate your garden and reduce erosion over the winter, you will remove it in the Spring, so I recommend using something that can be easily removed.

20150921_112229.jpg

  This was a quick overview of amending your soil in the fall, but to understand why it is more beneficial to amend your soil in the fall vs the spring we need to take a closer look at our soil. A much closer look at one region in particular the rhizosphere.

The rhizosphere is the region of soil that is directly surrounding the roots of a plant. A pretty specific region I know, but the rhizosphere is immensely complex and very important. On one plants root system there can be upwards of 30,000 different species of microbes. We know more about the surface of mars than we do about the rhizosphere, which is problematic, because the rhizosphere is paramount to plants survival. It is these microbes that allow the plants to absorb nutrients from the soil.

  The rhizosphere is comprised of billions of different species of microorganisms, but these can be grouped into five basic categories of microbes: bacteria, actinomycetes, fungi, algae and protozoa.

IMG_2222.jpg

 Bacteria

  Bacteria by number are the most present microbe in the rhizosphere. Though it is nearly impossible to explain what all of these bacteria are doing for the plant, there are three main functions that these bacteria provide. They fix nitrogen in the soil by oxidizing nitrite (the nitrogen in our atmosphere that is unusable for plants) into nitrates which can be absorbed by the plants. They increase phosphorous levels in the soil, which is an important nutrient for plants, and produce growth hormones for the plants. In exchange for all of this, the plants give the bacteria a home in their roots.

 Actinomycetes

  Actinomycetes are much less common in the rhizosphere than bacteria, but no less important. Actinomycetes are technically a bacteria, but they behave much more like a fungi. They break down organic matter making it bio available for the plants, and they create antibiotics that the plants use to fight off harmful bacteria.

 Fungi

Fungi, are the largest organism in the rhizosphere, and probably the most recognizable. Fungi are decomposers, meaning that they break down organic matter, and this is incredibly important for our plants. The organic material that we add to our compost actually cannot be absorbed by plants. It isn’t until they are broken down by a decomposer that the organic compounds are returned to a simple enough state that they become bioavailable to our plants.

 Algae

Algae exist in very small numbers in the rhizosphere, primarily because they need to photosynthesize to generate energy, but there are algae that are found in the soil microbiome. These algae also help add nitrogen back into the soil.  

 Protozoa

One of the oldest living types of microorganisms protozoa play a relatively small roll in the rhizosphere. Amoeba are a common type of protozoa that many people recognize, and one of the most common protozoa in the rhizosphere. Amoebas are like the wolves of the microbiome. Their role is patrolling the microbiome consuming bacteria.

IMG_2226.jpg

  These five types of organisms comprise much of the rhizosphere, but as I stated this is an immensely complex region of life, and what I have said above barely scratches the surface of it. However, we do know that the rhizosphere is incredibly important for the plants existence. Plants will use 30% of the carbon that they uptake to produce sugars and amino acids to feed these microbes living in their roots.


It can be tempting to relax at the end of a growing season and focus your attention on preserving your harvests, but there is important work that needs to be done to your garden at the end of the season. And if you do, it will set you up for a more successful gardening season next year.

Fermentation

Over the past couple years, I have been learning a lot about food. Growing it, cooking it, the nutrition elements of food, and its environmental impact. And through this I have had my eyes opened to a magical world that I had never considered before. The world of Microorganisms. Microorganisms are the microscopic bacteria, fungi and viruses that live on everything. Their environment is referred to as the microbiome. They are all around us, and essential for the function of life how we know it. They are in the soil allowing plants to absorb nutrients, they are in our stomachs allowing us to digest, and they are in our compost allowing it to decompose. To help you understand how important microbes are to your function as a human, for every one human cell that you have in your body, there are nine microbes living in or on your body somewhere. I bring this up, because this week I intend to talk about the oldest form of food preservation know; fermentation. But you can’t talk about fermentation without talking about the wonders of microbes, and one microorganism in particular. Lacto-bacillus.

microbiome_illust.png

  If the name lacto-bacillus sounds familiar to you, that is probably because of one of its byproducts. Lactic acid. Lactic acid is the stuff that gives sourdough its flavor, or makes your muscles sore after a long run, and it is a crucial element in fermentation. Lactic acid is why lacto-bacillus is so important for fermentation. The lacto-bacillus uses the lactic acid to create a high acidity environment where other bacteria cannot grow. This environment is also perfect for preserving food, because the high acidity breaks down any decomposition enzymes, and inhibits the growth of any harmful bacteria, making for a safe and easy way to preserve food.

4fce38f3643a593db9c0f053b577bd18.jpg

This blog post is going to be looking at lacto-fermentation, how to do it in your home, the materials that you are going to need, some important information to help keep it safe, and reasons why you should start doing this in your house. To help shed a light on this process, I reached out to Bennet Christian, a Victory Gardener with Mountain Roots who has a passion for fermentation.

Why Lacto fermentation

       There is a myriad of reasons why you should begin fermenting in your house. The first reason is it is super easy. Like many bacteria, lacto-bacillus is all around us. It is on the food we eat, in the air we breathe, and it is inside our bodies. Beyond the ease of it, there are a number of health and financial reasons why you should get into fermenting. When I talked to Bennet, he told me that from his small garden he estimated that he added about $750 worth of ferments to his harvest. Along with the value of the product, you can also save money on vinegars. If you are looking to do a lot of pickling, the price of vinegar can start to add up, but if you are using lacto-fermentation, you do not need to purchase vinegar.

            In addition to the financial benefits, there are many health benefits that you will get from fermenting. Fermentation is our name for anaerobic metabolism, or the process of microbes breaking down food without oxygen. This anaerobic metabolism is beneficial for health reasons, because it breaks down organic compounds in the food into more elemental forms, making them more available for digestion. Lacto-fermentation can also break down toxins in food, sometimes turning them into nutrients. This is true with grains. The fermentation breaks down phytates, a structure that binds minerals, and makes these available for digestion in the body. This is one of the reasons sourdough bread tastes so much better.

The probiotics within live fermentations are incredibly healthy as well. As I mentioned before, microorganisms play an incredibly important role within our digestive track. Eating foods that are high in living cultures helps your microbiome. Many foods advertised in the store with probiotics do not have living cultures, because they had to be pasteurized in order to be sold, and this pasteurization killed all of the living cultures inside of the ferments. Unlike most foods in the store that say they have probiotics, live ferments have millions of probiotics in them.

sauerkraut-superfood.jpg

             In addition to the health benefits, there are also the benefits that are a little harder to measure. These include taste and culture. I don’t think that it is a coincidence that a fermentation is called a culture. Not too long ago, ferments were a prized family heirloom. Like seeds, many immigrant families would bring their sourdough or sauerkraut starts with them to the United states because these starters were an integral part of their survival and their identity.

DSC_1778.JPG

Bennet told me during our conversation that every time he eats any of his fermented food, it takes him right back to his garden. He doesn’t just remember it, he feels that same intimate connection with nature and what he was growing when he was standing in his garden, or when he was eating his ferments.  Along with culture, home ferments just taste better. There are so many possibilities with recipes, and the fermentation process opens up a whole new world of flavor profiles that don’t exist anywhere else.  To quote Bennet again, “you get a foody to try it once and they will be hooked.” These are just a couple of the hundreds of reasons that I could think of to get into fermenting. And did I mention that it is super easy?

The-Ultimate-Guide-on-How-to-Ferment-Vegetables-FI.jpg

 The basics of lacto-fermentation

The basic overview of the fermenting process is that you submerge what you are fermenting in a brine solution, and leave it to sit out until it is done fermenting. There are some nuances to it, but it is about that simple. Lactic fermentation requires three basic ingredients: something to ferment, water and salt. The thing being fermented is already covered with lacto-bacilli, so all that you have to do is create an environment where they will thrive. This is where the brine comes in.

  The brine is a salt solution that inhibits the growth of many types of bacteria. There are two main ways to create a brine, and this will depend on what you are fermenting. If you are fermenting shredded or finely chopped veggies, you can use their own juices to create your brine. Just add the salt to the veggies, and squeeze the water out. The salt will help to pull moisture out as well. You will want to continue this squeezing and mixing until the veggies are completely submerged in the brine. If you are using whole veggies, or large chopped veggies, you will want to create the brine separately and then submerge the veggies. A general rule of thumb is to use 1-3 tablespoons of salt per quart of water to create a brine, but follow your recipes measurements for salt.

P8109030.JPG

  Once your culture is submerged, you want to make sure that it stays submerged. There are a variety of ways that you can do this. You can do this with fermentation weights, glass or ceramic containers, or improvise anything that fits. The most important things to remember with this is it needs to be easily removable, sterilized, and it needs to hold the veggies down. If it is doing that, then it is doing its job. Bennet told me that he uses rocks. He will walk around with a mason jar lid and find rocks the fit into it nicely then sterilize the rocks in boiling water and use them as is weights. I have also heard about people using cabbage leaves or carrot spears.

mason-jar-fermenting-weights_1024x1024.jpg

  Once you have your culture weighed down, all you have to do is wait, and let those lacto-bacilli do their work. The time required for a ferment will vary depending on what you are fermenting. Follow your recipe for this. Bennet told me that he will often look at two or three similar recipes to get an idea of his fermentation timeframe. If one recipe said that it would take 7 days and another said that it would take 10, he would start checking his ferment around day 6, knowing that it is getting close, and then he would just let it go until he likes the flavor if it. When exactly a ferment is done is more or less up to you.

While your culture is fermenting, it is a good idea to keep it in a cooler environment. Though mold shouldn’t be a problem, keeping it in a cool area should help prevent this risk. Luckily unless you are keeping your culture next to your fireplace, it getting too hot shouldn’t be a problem in this valley. It is also a good sign to see some bubbling in your culture while it is fermenting. Carbon dioxide is a byproduct of the lacto-bacillus, so if you see little bubbles that means that they are happy.

 Breaking down the ingredients

Though there are only three ingredients with fermentation, it is important to make sure that you use the right ingredients.

IMG_0458.JPG

 Veggies

 It is important to make sure that you use fresh veggies for this. The fresher they are, the better they will preserve. Depending on what Veggies you are using there are different ways that you will want to prepare them. For hard veggies you will want to grate them. Firm veggies you will want to chop. Soft veggies you will want to either leave whole, or chop into large peaces. Keep in mind that the larger the pieces of veggies are, the longer they will take to ferment.  

190219-salt-al-0956_7048f17734af634977688d82f3c3610b.fit-760w.jpg

 Salt

Not all salts are created equally, and this is really important for fermenting. Salt not only creates an environment where the lacto-bacilli can push out other bacteria, it adds flavor and crunch to your ferment. Though you do not need to get artesian black sea salt, you shouldn’t use basic table salt either. There are certain things that you need to keep in mind with the salt that you use. Firstly, you need to avoid iodized salts. Iodine is antibacterial, which is problematic when trying to foster the growth of a bacteria. Make sure that you purchasing salt that is not iodized, and does not have caking agents in it. Both of these will interfere with the growth of bacteria. Secondly, with this it is important to think about the size of your salt granules. The size of your salt granules will affect how much empty space there is in your measurement, so if you are using large granule salt you might want your table spoon to be a little fuller than normal.

 Water

What kind of water you use is also important. The biggest thing to look for is whether your water is treated or not. If it is treated like tap water, then it has chlorine in it. Chlorine, like iodine, kills bacteria, which is counterproductive for fermentation. If you are using chlorinated water, you will need to dechlorinate the water. This can be done by boiling the water for 20 minutes, or letting it sit out for 24 hours for the chlorine to burn off.

IMG_0069.jpeg

 Fermenting

Once your ferment is up and going, there are a couple things that you want to keep in mind and keep an eye on just to make sure things are still going well.

 The Nose Knows

            The easiest thing to do to make sure that you still have a happy ferment is to smell it. This will tell you very quickly if you are growing something good or something bad. Though a ferment will have a sour smell, it will be a good sour like pickles or sauerkraut. If it is smelling like rotten food then something has gone wrong. If this is the case, it should be thrown out and the container sanitized. Bennet told me that if one of his ferments was starting to get a funky smell he would shake the jar, and by the next day it usually is back to smelling great. When dealing with your ferments always follow your nose

kahm-yeast-overhead.jpg

 Molding

It is possible for mold to begin to develop on your ferment. This shouldn’t happen to anything under the brine, but mold might form on top of the brine, or any veggies that are breaking the surface. If this happens, that does not necessarily mean that the whole ferment is spoiled. Simply remove the molded section, then let the ferment sit for a while. If it returns to having a good smell, then it should be safe. This is also true with kahm yeast. Kahm yeast is a harmless yeast that often forms at the surface of a brine. It is a white colored film. If you notice this, just remove it from your brine and if the smell returns back to normal then your ferment is back on track.

 Cold Storage

Once your culture is nearing the end of its fermenting, you will want to start tasting it to know when it is the flavor that you want. Once it is ready, move it to cold storage. This will dramatically slow down the fermentation process, and make your ferment last longer. Note that this does not stop the fermentation process. Cold storage is not permanent storage for your ferments, but will extend their life by 3-4 months

 Safety

            There are many people who are hesitant to get into the world of fermenting because of the perception that it is not safe, but home fermenting is incredibly safe. If you are following a recipe and using the proper amount of salt, that will insure that the lacto-bacilli will populate the culture, and once they are going, they will push out all other bacteria. Many people often get worried about Clostridium botulinum (the bacteria that causes botulism), but the lacto-bacilli will create an environment that is too acidic for the Clostridium botulinum to exist, killing any that are present. Interestingly, botulism didn’t become a well know concern until the invention of canning. This is because there is a much higher risk of encountering botulism with canning than with fermenting. Despite this, there are still risks with fermenting, be it very low. Just follow your nose and you should be fine.

fermented600.jpg

It’s crazy to think that for thousands of years, fermenting food was a common practice within every house. There is so much rich culture in fermenting. Human civilization was founded on fermentation, and though we have kept the beer, in the last 70 years we have turned our back on this ancient art. Fermenting food caries a stigma within our society of being gross, but I challenge anyone to turn their nose up at a good live culture sauerkraut. I hope to see us return to a place where we value our ferments, and their cultures became intertwined with our culture once again.  

The information for this blog was from The Art of Fermentation by Sandor Katz, and cultures for health https://www.culturesforhealth.com

As was explained in this blog there are slight risks for home fermentation, so experiment at your own risk.

Can all you Can

Fall is always a surreal time for me. There is so much to love about it: the leaves changing, cold nights, sweaters, and hot tea in the mornings. Life seems to slow down. Kids are back at school, and the hectic-ness of summer fizzles out. It is a time of change marking the transition from our summer lives to our winter lives. Autumn is also the culmination of the growing season. In a normal year, it is marked by apple festivals and pumpkin patches. There seems to be something inside of all of us that is enchanted by a bountiful harvest. It’s hard to not get a childlike excitement thinking about an apple orchard in fall. But this bewitching end of the growing season also brings about the realization that for many of us the time of growing our own food, and eating locally, is done for the season. After the last leaves fall, we are back to the supermarkets buying veggies and fruits from half way across the world. However, this doesn’t have to be the way of it. In fact, for most of human history this was not an option. The only option was to make the harvest last through the whole winter, the best way to do this is through canning.

Fall+Foliage+on+Kebler+Pass+near+Crested+Butte.jpg

Why can

Canning is a simple and fun way that you can make your harvests extend through the whole winter. There are many benefits that come along with canning you can: save money, increase your self-sufficiency, keep your heritage alive through family recipes, home canned veggies can be more nutritious than store bought canned goods, plus it makes your cabinets Instagram worthy. The list goes on and on. But the biggest reason for canning is that it prevents food from spoiling. Fresh produce spoils for a number of reasons including, micro-organisms (yeasts, bacteria, fungus) that breaking down the food, decomposition enzymes that are present in the plants, oxidization, and moisture loss. Canning prevents all of these.

CANNING-7.jpg

Clostridium Botulinum 

Though canning will prevent all of your hard work growing from going to waist, it is not a fool proof system. There is a bacteria called Clostridium Botulinum that can live through the canning process if it is not done correctly. These bacteria are responsible for the deadly form of food poisoning known as botulism. Clostridium Botulinum can survive the temperatures of boiling water, and live on the surface of all food. However, they need an anaerobic environment, or an environment deprived of oxygen to become active. This is why it is not a concern with fresh food, only canned food. Despite its high threat level Clostridium Botulinum is really easy to prevent.

  The bacteria cannot grow in high acid environments, or environments with high levels of sugar. This is why it is important to follow canning recipes that you have, and don’t skimp on the sugar, or change the vinegar (unless you know the two vinegars have a comparable PH level).

How-to-Can-Vegetables-Using-Pressure-Canning-2.jpg

Before you get started

Before you begin actually canning, it is important that you have a recipe that you will follow, understand the steps that will be involved, as well as some basic information about canning. It is important to know the PH of your veggies/fruits, how to sterilize your equipment, if you are hot or cold packing, and how much head space you’ll need.

 High PH (low acidity)

Foods with low PH require more attention when canning because they are at higher risk of having Clostridium Botulinum growing in them. Low PH foods include red meats, seafood, poultry, milk, and all fresh vegetables except for most tomatoes. There are two basic approaches to canning foods with a low PH. Use a pressure cooker, or make the food more acidic.

Pressure cookers allow water to boil at a higher temperatures making it so that you can kill the Clostridium Botulinum. Water temperatures need to be between 240˚-250˚ to kill Clostridium Botulinum. If you have a pressure cooker, it is easy to find recipes for canning veggies/fruits in them.

If you do not have a pressure cooker, then you will need to decrease the PH of what you are caning (make it more acidic). Clostridium Botulinum can not grow in an environment with a PH lower than 4.6. Two easy ways to increase the acidity of your veggies/fruits is to either add acidity in the form of vinegar or lemon juice or ferment your veggies/fruits. Simply adding vinegar or lemon juice will be the easiest way to do this. Follow your recipe to see how much acidity you should add. I will be discuses fermenting in another blog (it’s worthy of its own conversation).

 Low PH (high acidity)

For foods with Low PH, you do not need to worry about adding acidity to them, but you should still follow the steps of your recipe to ensure that it is safe. Low PH foods include fruits, pickles, sauerkraut, jams, jellies, marmalades, and fruit butters. It is important to note that some tomatoes have a PH that is higher than 4.6. If you are working with sweeter tomatoes, it would be smart to check the PH with a PH tester strip. You can buy them here (they are pretty cheep).

Screen Shot 2020-09-29 at 12.03.43 PM.png

 Sterilizing

Once you know the PH of what you are canning and you have decided on a recipe, it is important to make sure what you are working with is sterilized. It is important to clean your veggies/fruits, and equipment, but since bacterial and fungal spores are hard to remove, heat is your best friend. For this, it is important to know how long your jars will be submerged in boiling water. If they will be submerged for more than 10 minutes you do not need to do a pre-sanitizing, because this long of a canning process will sterilize the jars and anything that is in them. If the canning recipe is calling for less than 10 minuets in the water, than the jars will need to be pre-sterilized.

It is important to take altitude into account for your times since water boils at a lower temperature at higher altitudes. Most recipes set their times for water boiling at sea level. This will need to be adjusted for us here in the Gunnison valley. A good rule of thumb is to add 1 minute for every thousand feet above sea level. So for Gunnison you want to add 7 minutes and 40 seconds to any boil times. In Crested Butte, you should add 8 minutes and 50 seconds, or 9 minutes if you’re up on the mountain. If your canning time is less than 10 minutes, you want to make sure and expose your jars and veggies/fruits to a little air as possible. This will help to ensure their cleanliness.

1371609172980.jpeg

 Hot Packing vs Raw (cold) packing

            Another distinction to know is whether you are using a hot packing, or a cold packing method. Hot packing is more beneficial in a boiling water canner because it removes more of the air from the veggies/fruits, helping them stay fresh in the cans longer. Raw packing is a better approach for using a pressure canner. Because the high temperatures mitigate all of the side effects of raw packing when using a water boiling canner.

 Hot Packing

For hot packing, the veggies/fruits are blanched in the packing liquid to ensure the breakdown of decomposition enzymes and the release of oxygen from the plants that will make them spoil faster. Once blanched, the veggies/fruits and packing liquid are poured into a jar. Make sure that the jar is heated before this to prevent any risk of it cracking from the temperature change. Once it is full, use a thin spatula or spoon to compress the veggies/fruits into the jar, making sure that there is no excess air bubbles in the liquid.

 Raw Packing

            For raw packing, the veggies/fruits are prepared and then packed tightly into the jar. The packing liquid is then boiled, and poured into the jar. Once it is full, use a spoon or thin spatula to compress the veggies/fruits into the jar, making sure that there is no excess air bubbles in the liquid.

Screen Shot 2020-10-01 at 3.45.30 PM.png

 Head space

            Head space is the space the is between the lid of the jar, and whatever you are canning. The head space is important  because it provides space for the food to expand during the cooking process, as well as helping form the vacuum once the cans are cooling. Your recipe should tell you how much head space to leave in your jars, but here are some general rules of thumb.

1/4-inch for jams and jellies.

1/2-inch for fruits and tomatoes.

1- to 1-1/4-inches in low acid foods to be processed in a pressure canner.

Once you have considered all of these things, found your recipe, and prepared your veggies/fruits, the rest of it is easy. The first thing that you will need to do is gather your materials.

Canning supplies

  •  Large pot for boiling water (make sure that this can hold enough water to have 1 inch of water over your jars).

  • Jar grabber (trust me, these are nice).

  • Jar lifter.

  • Jarring funnel.

  • Thin spatula (to stir contents poured into the jar).

  • Canning jars, new lids, rings.

  • Paper or cloth towel to wipe the jars.

graniteare 8 pc canning set.jpg

Once your materials are gathered, you’re going to follow these basic canning steps, but please adjust them to whatever your recipe is calling for.

Canning steps

canning-jars..jpg

 (1) Prep the ingredients.

  • Wash the veggies. Remove any blemishes or bruises.

  • Follow your recipe for the contents of your jars.

(2) Sterilize your working areas and materials

  • Sterilize all surfaces and materials, especially if canning times are less than 10 minutes.

  • Sterilize the jars in boiling water. If you do not need to sterilize the jars, then warm them up in hot water to help prevent cracking.

  • Soak the lids in hot water for 10 minutes to soften up the rubber (get new lids every time).

  • You can leave the rings at room-temperature for easy handling.

 (3) Fill the jars.

  • If utilizing a hot-packing method, blanch your veggies/fruits. If using a raw-packing method, boil your packing liquid.

  • Use the jarring funnel to fill your jars.

  • Stir with a spatula to ensure that there are no air pockets.

  • Leave the appropriate amount of head space that your recipe calls for.

 (4) Wipe the rims.

 (5) Screw on the lids and bands.

  • Do not over tighten. You want it to be tight, but not as tight as you can get it. If it is too loose, then it will not make a proper seal, but if it is over tight, then air will not be able to escape, and this will stop the vacuum from forming, and can lead to the jar breaking.

(6) Boil.

  • Prep your boiling water in a large pot that can cover the top of your jars with at least 1 inch of water.

  • Fill this pot half way up, and boil water.

  • Make sure that the water is at least 1 inch over the top of the jars.

  • Boil for as long as the recipe calls for.

  • Adjust boiling times for altitude.

  • Have a second container of boiling water going incase you need to add more water half way through the process.

(6) Remove and cool until you hear the popping sound of the seals forming (they might not pop, but this does not mean that they did not seal).

  • Do not force cool them. Let the jars cool at room temperature for 12-24 hours.  

  • Check to see that the lid sealed. You will hear the pop (usually).

  • See if the lid is concave and has a high pitch twang if you tap it with a metal spoon. When you push down on the center of the lid, it should not pop back up. 

  • Store in a cool dry place, no hotter than 95˚, and plan on using within a year.

There are many different ways to canning and preserving food, and even more recipes for it. Yoou should take some time to explore what techniques and recipes are out there. One technique that I will look at is fruit spreads. Spreads such as jams, jellies or butter, are some of the more popular ways to preserve fruits. This is because of how easy they are to do.

homemade-jam-recipes.png

 Jam’s jellies, and butters.

  All fruit spreads are just slight variations of the same thing; fruit, sugar, pectins, and acids. For most fruits, the acids and the pectins are already present in the fruit, so it is really just fruit and sugar. I will break down each of these elements and why they are important.

 Sugar

Sugar is extremely important to this process because it acts as the preserving agent. Though most fruits have a low enough PH to ensure that Clostridium Botulinum does not grow, the sugar content also prevents the growth of this bacteria. This is why it is important to not skimp on the sugar measurements of your recipe. It is best to stick to cane sugar, or beet sugar. You can substitute honey or corn syrup, but these might alter the flavor of the spread and can interfere with the jelling process.

 Pectins

Pectins are a naturally forming substances in fruits, that when mixed with sugars and acids, form a gel consistency. All fruits contain varying amounts of pectin. Apples, crab apples, gooseberries, some plums and grapes, all contain enough natural pectin to form a gel when mixed with acid and sugar. Other fruits, such as strawberries, cherries, and blueberries, contain little pectin and must be either mixed with other fruits that are high in pectin, or have pectin added to get a gel consistency.

 Acid

Acid is needed for two reasons. One, it helps with the preservation of the fruit spread. Secondly, it helps the pectins form a gel consistency. It is important to follow your recipe’s measurements for added acid, because if there is too much or two little, the gel consistency will not set up.  

canning2-e1517251924917.jpg

  With winter creeping in, our days of local fresh produce are numbered, but this does not mean that the days of us eating off of our gardens are numbered. This quick overview of canning shows how easy you can can the produce you grew in your garden. This will ensure that your garden will keep feeding you through the winter. So get out there, and start canning, and liberate yourself from the industrial food system.

Most of the information in this blog was provided by the National Center for Home Food Preservation. If you are looking for more information or recipes, this website has a plethora of information  https://nchfp.uga.edu/publications/publications_usda.html

Seed Saving

Fall is here. The valley is awash with golds and reds. There’s the special crispness in the air that only comes with the changing of the seasons. Our harvests have been coming in and many of us are starting to think of what we will do for the next growing season. One easy and great thing you can do for your garden is to start practicing seed saving. The majority of our society has forgotten the importance of seed saving, but this is not how things have always been. Many English families immigrating to the united states would bring seeds with them. They were so preciouses that they would smuggle them into the country sown into dress hymens, or hat brims. These seeds were important to them. They were part of their heritage. There are many reason why it was so important for these English immigrants to saving their seeds, and these are all great reasons why you should start saving your own seeds as well.

ads4-14b.jpg

Benefits

There are a number of ways that you can benefit from saving seeds. Probably the biggest benefit is the specialization that you can get from seed saving. Through seasons of seed saving, you can begin to get plants that are best adapted to your growing climate. This is easily done through saving seeds from the strongest healthiest plants from your garden each year.

Another benefit to saving seeds is the financial benefits. Depending on the plant, it is easy to save dozens, if not hundreds of seeds from a single plant, as opposed to buying new seeds each season.

Saving seeds from your garden also helps you to keep higher genetic diversity in the food system as a whole. It limits your dependency on large seed producing companies, and is a more traditional and sustainable gardening practice. 

DSC_1505.JPG

Getting started

Seed saving can be a little bit of an intimidating thing to get into. Like many things with gardening, there are levels of complexity to it, and what you want to get out of it will depend on what you are willing to put into it. I’ll explain some of the basics here, as well as things to consider if you are interested in taking your seed saving to the next level. Regardless of how much experience you have as a gardener, I believe that everyone should try seed saving.

DSC_1502.JPG

 Knowing your plants

The first and most important step to seed saving - at any level - is knowing your plants. Are they hybrids? Open pollinators? Heirlooms? What family and species are they? How do they pollinate? Is this an annual or a biannual plant? These are all important questions to know before saving seeds from you garden. The answer to these questions will also tell you how difficult it will be to keep the seeds from these plants. These questions have to be answered on an individual basis for each plant that you intend to save seeds from. But first, let me break down what these all mean.

Hybrids vs Open pollinators and heirlooms

Understanding whether your plant is a hybrid or an open pollinator is very important when seed saving. The reason for this is that hybrid plants are a mix of two or more plant species, and like mules, these hybrids are often not genetically stable and often cannot reproduce. If you are saving seeds from a hybrid plant, it might be the same plant next season, it may grow into one of the parent plants, or it might be a sterile seed.

Open pollinators which include heirloom can openly breed with other plants, and will always produce a viable seed. As long as you know what the plant is breeding with, you can also know what kind of plant your seed will be grow to be. Heirloom varieties are just specialized breeds of plants.

CI_tom-b00351.jpg.rend.hgtvcom.1280.1600.jpg

What Family, Genus, and species is the plant.

It is important to know what family, genus, and species your plant is. This is important to know because plants of the same family can cross-pollinate to produce unwanted hybrids. It is also important to know what “weedy” cousins are in the same family, because this can also cause unforeseen cross breeding. An example of this is carrots and Queen Anne’s lace. Queen Anne’s lace can be found all over the Gunnison Valley, and if it mixes with your carrots, it can produce a bitter and woody cross breed that will disappoint you as soon as you try to bite into it.

How Do Your Plants Pollinate

Understanding how your plants pollinate is a key factor in ensuring that there is not any cross breeding between plants in your garden. Figure out whether you are working with a self-pollinating plant, out-crossers, or diacious out-crosser. I’ll get into this more later.

Annual vs Biannual

Many of the plants we grow in our gardens are annuals. We grow them because we can harvest them the same season, but many of these plants are actually biannual in their whole life cycle. We think of them as annuals because the part that we want to eat develops in the first half of their life cycle. Some bi-annuals include carrots, beets, chard, rutabaga, cabbage, brussel sprouts, cauliflower, kohlrabi, kale, brassicas.


Just Getting Started

seed mandala full low res.jpeg

As I mentioned above, seed saving, like many things in your garden, can be as easy or complicated as you want to make it. It all depends on your goals. If you are just starting, or have a little bit of experience under your belt with this, here are my recommendations.

Check to see if you are saving plants from a hybrid or an open pollinated plant. I would recommend sticking to open pollinators, because it can be discouraging to go through all of the effort of saving seeds, only to learn the next year that they are not fertile.

Stick to self-pollinating plants. Self-pollinating plants are the easiest plants to save seeds from, because they most likely have not crossbred with anything. This is not a guarantee that they haven’t crossbred, but they will most likely be breeding true. Self-pollinating plants have a complete flower which means that they have a pistil and anther, or the female and male parts of the flower. Most self-pollinating flowers will have a closed section, like with tomato flowers. Note how the center is closed off. This is to insure that cross pollination doesn’t happen. Some common self-pollinating veggies are legumes and tomatoes.

tomato-blossoms.jpg

Stick to annuals such as Beans, squash, tomatoes, broccoli, lettuce, peas, radishes, spinach.

More Experienced Seed Saving

winnow.jpg

If you have some experience with seed saving, and you are looking to start saving seeds from a larger variety of plants, here are some things that I would recommend.

Branch away from self-pollinators. If you are feeling confident about saving your pea and tomato seeds, try branching into some outcrossers such as squash. With outcrosses we need to start asking ourselves more questions about our plants and our gardens. Since we are now opening up the possibility of cross-pollination, we need to learn more about the plants and pollinators around us and utilize some isolation techniques.

            Understanding the family, genus, and species of the plants around you can help you understand what kind of isolation you should be doing. Be careful, because the common names for plants can sometimes be misleading.

  It is also important that we understand how our plants are being pollinated, and what is pollinating them. If they are being pollinated by the wind, then we are going to need something to cover the flowers that won’t allow airborne pollen through. Something like a paper bag tied around the flower. If our plants are already being pollinated, then we only need to keep the insects out.

  Understanding both of these things will help us decide which isolation technique will be best for our plants. The easiest way to avoid this is to only plant one species in our gardens. Instead of three different kind of zucchini, maybe settle on just one zucchini. If you are wanting more diversity in your garden, you are going to have to isolate your plants. There are two main ways to do this: timing, and isolation cages.

garden-bed-succession-planting-orwfd_wordpress_com.jpg

 Timing.

            If you know that your plant flowers at a very specific time in its life, you can stagger your planting so that your varieties are not all flowering at the same time. This is a difficult technique for us in the Gunnison valley considering how short our growing season is.

Isolation cadges

            Isolation cages are used to limit the access of pollinators to the flowers on the plants. The isolation cages are kept around the plants until they are ready to pollinate. Once they are ready to pollinate, you open up the cages for one species to pollinate each other, and close this cage before you open the cages of another species.

cc55415b53212d5273d99441e27535be.jpg

 Population size.

  Plants, just like anything, require genetic diversity. This can be problematic if you are saving seeds from a small population of plants in your garden. You won’t notice the signs of inbreeding for a couple years, but if this is something that you are going to get into, you should look into the needs of the population size to ensure genetic diversity. This varies for each plant.

Biannuals

  If you are up for the challenge, you can always try biannual. Biannuals require a cold season to reach the level of maturity where they will produce seeds. This can be difficult in the Gunnison valley. The two main techniques for overwintering plants in harsh conditions are to leave them covered in the ground, or to store them in a root cellar.  Overwintering plants in the ground can be risky because of the cold outdoor temperatures, but over wintering them in a root cellar is difficult to ensure that the plant stays alive through the transplants. If you are doing this with one or two plants, it can be easy to move them to a large pot and over winter them with a grow light in a garage. It is important that they stay in a cooler environment to ensure that they develop seeds. If they stay too warm over the winter, they will not move on to this phase of their life. Biannual include carrots, beets, chard, rutabaga, cabbage, brussel sprouts, cauliflower, kohlrabi, kale, and brassicas (need to get cold before they can go to seed).

DSC_1339.jpg

Storage/ prep of your seeds.

Knowing how to get the seeds from your plants is only half of the process. Now that you have your seeds, you need to know how to store them. For this process, it is important to remember that a seed is a living thing, and though it doesn’t have terribly complicated needs, it does have some needs. The first thing to figure out is whether your seeds need to go through a fermentation or not.

 Fermentation

IMG_2197.JPG

Fermentation is done with seeds from fruits. There are two important things that this simulates for the plant. Many fruit plant seeds have evolved to germinate in the rotting, decomposing fruit. Fermenting the seeds simulates this decomposition and the microbes in the ferment help to kill any bacterial infections that the seed might have on its surface. Fermenting seeds is actually much easier than it seems.

The first step is to remove the seeds from the fruit.

  • Once the seeds are removed, put them in a small container and fill it with water. Somewhere between 100% - 200% by volume will do. It is not an exact science, you just want to make sure that it is not too much water. If you dilute it too much, this will stop the fermentation process.

  • Cover the lid of the container with either cheese cloth or a t-shit. You want to make sure that there is still air flow into the container, but no bugs can get in.

  • Ferment for about a week

  • Once the week is over, there should be a small layer of mold on top of the water, something resembling a scoby. This is a good sign.

  • Pour out the seeds at this point. You want to discard the mold on top, as well as any floating seeds. Floating seeds are bad seeds that won’t germinate. Next, be sure to thoroughly  wash off the seeds.

    Be sure to dry the seeds quickly. High temperature and humidity will make the seeds germinate or mold. Do not dry on paper, cloth, or non-ridged plastic as they will stick. Do not dry in temperatures over 95˚ since this will cause damage to the seeds (don’t dry them in the oven, no matter how low the oven setting is). From here, the seeds are ready to store.

IMG_2198.JPG

 Storing

seed-sound-matching-game-3.jpg

These are the steps that you should do for storing the seeds whether you needed to ferment them or not.  The most important thing with storing seeds is for them to be dry. If they are not fruiting plants, you want to let the seeds dry as much as possible on the plant, but once you harvest them, you will probably need to dry them more. Seeds need to contain less than 8% moisture in them, as this will insure that no microbes will grow in them. The easiest way to check to see if a seed is dry enough, is to see if it will bend at all. If you can bend or indent a seed, it still has too much moisture. Once they are dry enough, they will crack rather than bend.

white Silicagel.jpg

  The easiest way to dry out your seeds is to use silica beads (like the ones that you get with beef jerky). Place the seeds with an equal amount of silica into an airtight jar. You want to make sure there is a barrier between the silica and the seeds, so either leave the silica in the packets, or put the seeds in a paper envelope. After a week, the seeds should be dry enough. Take them out and check them to see if they break or bend. If they are dry enough, transfer them to another airtight container. It is important that this is an airtight container, so that it does not let in moisture. Note that light plastic such as zip-lock bags are not moisture proof.  Once you have your seeds in an air tight container, you want to store them in a dry, cool place. Dry is more important than cool, but a good rule of thumb is that the humidity and the temperature added together should not exceed 100. If your seeds are stored in these conditions, they should last for a very long time.

  This is a lot to unpack here. If you are new to the world of seed saving, I am hoping that this did not scare you off. Regardless of your experience, I would highly recommend that you try seed saving, even if you do something as simple as harvest some dried peas in a mason jar. Luckily, like everything with our gardens, there is no harm in just trying it out. So get out there and find those dried up plants in your garden and see if there are any seeds in them.

  If you are interested in digging deeper into the art of seed saving, here are some amazing resources that you can start diving into.

Resources

Seed to Seed Seed saving and growing techniques for vegetable gardens by Suzanne Ashworth is an amazing book that is a wealth of knowledge about seed saving.

https://seedalliance.org

Extending the Growing Season

This week I heard something that I haven’t gotten a chance to fact check, but my gut instinct from living in the Gunnison valley tells me that this is right. I heard that if you look back through the temperature records for the Gunnison valley, there have been less than seven days in late July that have never had a frost. Every other day in the year at some point in the past has dropped below freezing. This just highlights how inconsistent and short our growing season can be. This is why season extension is key to trying to garden in the Gunnison Valley. I recently caught up with Robert Johnson to learn a little more about extending this short season that we have. Robert is a self-taught gardener who, through years of trials and experiments, has figured out a way to grow year round in the Gunnison Valley. He seemed like the perfect guy to ask my questions to.

When I first got to Robert’s property, I was immediately blown away by how much of his growing space was in either hoop houses or cold frames. Almost his entire garden was under a hoop house or in a cold frame. While getting a tour of his garden, he explained to me that he got his two massive hoop houses from Walmart when they were trying to throw them away. Walking around his garden I started asking him some questions about techniques he was using to extending his season.

Row cover

            The simplest method for season extension would be row cover. In the Gunnison Valley, row cover is a gardeners best friend. This stuff can help keep early and late (as well as mid-season) frosts away. It can protect your plants from pests and shade your plants from the intense sun that we get in the middle of summer. If you don’t already, I would highly recommend getting some row cover for your garden.

GS09130_2.jpg

Selecting the right breed.

After I asked him the question, he immediately stressed to me the importance of selecting early season breeds of any plant that you are growing in your garden. There are a variety of breeds of every plant. Some of them have shorter days to maturity, and some of are situated better for the cold. Finding the right breed for our climate can be the difference between harvesting from your garden, and watching everything freeze before it’s ready. Here is a list of some of the breeds that Robert is using.

dried-vegetable-seeds.jpg

Potatoes: Golden globe and Norkotah.

Brussel sprouts: Jade Cross E.

Peas: Cascadia and Avalanche snow pea.

 Acorn Squash: Table Ace and Gold Nugget.

 Tomato: 4th of July and Moskvich.

Robert also informed me that ACE hardware does a pretty good job at only getting breeds of plants that will do well in our climate.

Micro climates

            A big part of extending your growing season is understanding your garden’s micro climate. Unfortunately, the temperature that they read at the airport, is seldom the actual temperature that you will get at your house. Slight variations in geography, wind exposure, and soil moisture, will all cause slight variations in temperature. Not to mention a thousand other factors. These will most likely only be slight variations, however, a variation of 2-3 degrees can be devastating for your garden on a night that was supposed to 33˚. The best way to figure out your own microclimate is to simply test your own temperature. You can easily compare this to what is being reported for the weather and learn if your garden is going to be colder or warmer than what they are predicting.

DSC_1338.JPG

Passive solar.

            One of the keys to season extension in this valley is storing heat from the sun throughout the day. This can be done in multiple ways such as greenhouses, hoop houses, or cold frames. All of these structures work under the same basic principle of capturing and retaining heat from the sun. We are all familiar with a greenhouse, and most of us would love to have one, but just because you don’t have a greenhouse doesn’t mean that you can do anything. Hoop houses and cold frames are great and easy ways to extend your growing season and could be added to your garden to help you with this growing season.

DSC_1528.JPG

Cold frame.

A cold frame is essentially a box with two open sides opposite from each other. One of the open sides is placed over your garden, and the other open side is covered with either a glass or plastic. These boxes can be constructed out of just about anything. You could use be a wooden frame, hay bales, cinder blocks, or basically anything that you can stack up into a wall. Robert showed me that for his cold frames, he constructed them with wood that was lined with a foam insulation. He also gave me his secret to building a light fixture into the side of his cold frames which he puts an outdoor incandescent light bulb in. This light bulb can add enough extra heat to your cold house to save your plants on those colder nights. Here is a quick how-to-video on cold frames. You do not have to follow his design directly, but it should give you a good idea of what to do in your own garden.

Hoop house.

            Hoop houses might be the easiest structure you can build to extend your growing season, especially if you already have a raised bed. Hoop houses are pretty simple. To construct one, attach PVC to the side of your garden bed and bend it over to the other side if your garden. Do this at multiple places down your garden and attach them all to one PVC pipe that spans the top of your garden bed. This skeletal structure is then covered with either row cover or a thick plastic. Both of these will help to hold heat in the garden. Robert gave me the hint that he uses welded wire mesh instead of PVC pipe for some of his smaller beds. He told me that this mesh wants to hold a rolled up position. It can be unrolled, over the garden, and when it tries to roll back up it will close down on the edges of the garden, creating the structure of a hoop house. Cover it with row cover or thick plastic, and you have an easy hoop house. Here is a quick video that shows how to build an easy hoop house over your garden bed

IMG_2190.JPG

Both of these are easy ways to build infrastructure that will extend your growing season. But there are some easier tips that you can do to increase the heat in your garden just a bit. Many of us use walls of water on our gardens, but we can also use water bottles or buckets to keep some heat under our row cover at night. We can also put some string lights under our row cover to help keep a little bit of heat in our gardens. Lining the walls of our raised beds with something like cinderblock that will soak up heat during the day and put it out during the evening can help. Regardless of what you are doing to extend your season, if you are growing in a green house or running out to throw row cover over your garden as the snow is falling, there are many things that you can do to extend your season, but you have to be doing something here.


Storing Your Harvest

What a week! Living in the Rocky Mountains is always a surprise when it comes to the weather. Anyone who lives here understands that we rarely have smooth transitions from one season to the next. Instead, we usually have a month or two where each week seems to be a different, random season. One week it is highs in the 80’s and then the next week it 5 inches of snow. This type of weather can be a nightmare for gardeners in the spring and fall when we are trying to get our gardens either started or harvesting from them. Because of this, we need to be fast to act and sometimes we don’t get to decide when we are harvesting from our gardens. Sometimes that is decided for us.

IMG_3355.jpeg

Sudden harvesting can leave us with a lot more fresh produce than we know what to do with. In this case, it is good to understand techniques that we can use for storing these veggies so that we can eat from our garden throughout the year. In this blog, I will not be looking at canning or pickling, but rather freezing and other techniques to store your veggies.

How to store what:

DSC_1603.JPG

The first thing that you need to know when trying to store your excess produce is how the vegetable be stored. Probably the easiest question to first ask is whether this vegetable can be frozen or not. Many veggies can be frozen like peas or broccoli. However many root vegetables do not freeze well, and are better stored in different conditions. Let’s talk about freezing veggies first.

Freezing:

frozen-vegetables.jpg

Freezing your extra harvest is one of the easiest ways to preserve your harvest, through the winter. There are also very little nutrients lost through the freezing process, which makes it one of the more attractive options for vegetable storage. Though freezing is one of the most straight-forward storing processes, it is a bit more complicated than just sticking a leaf of kale into the freezer. The issue with freezing veggies this way is that they will still continue to decompose and rot in your freezer. Every veggie is naturally coated with an enzyme that facilitates the decomposition of the plant (its actually a pretty cool adaptation of the plant to help its nutrients return to the soil). This enzyme survives, and will continue to operate in freezing temperatures, but it can’t survive high heat. This is why we blanch our veggies before freezing them. Blanching is a fancy term for boiling them for a short time. Boiling the veggies for a short period of time destroys the enzyme responsible for rotting, but it preserves most of the veggies nutrients and texture that they have when they are raw.

blanch.JPG

Steps for blanching:

1) Washing the veggies

            You want to make sure that the veggies are thoroughly washed before you begin the blanching process. For cabbages, you will want to submerge them in water for 30 minuets to get rid of any critters that might be hiding between the leaves.

2) Chopping up the veggies

            With this step, you want to prepare the veggies for how they will be frozen. This includes cutting off any stemmy sections since these do not freeze well. Remove any damaged parts of the veggies. With cabbages, you want to remove the outer most leaves.

3) Cook the veggies

            Place the cut up veggies into a pot of boiling water or a steamer basket above boiling water for the length of time required for each veggie. Here are some times for common veggies.

·      Artichoke Hearts: 6 minutes

·      Asparagus: 2 to 4 minutes depending on the stalk thickness

·      Beans (Green or Wax): 3 minutes

·      Broccoli (cut into 1-inch pieces): 2 minutes

·      Brussels Sprouts: 3 to 5 minutes, depending on size

·      Cauliflower (cut into 1-inch pieces): 3 minutes

·      Kohlrabi (cut into 1-inch cubes): 1 minute

·      Leafy Greens: 1 to 2 minutes (use the longer time for collards and cabbage)

·      Pea in the pod: 2 to 3 minutes, depending on size

·      Peas shelled: 1.5 minutes

·      Summer Squash: 3 minutes

4) Cool the veggies

            Immediately after cooking the veggies, you want to cool them down. Either run them under cold water or submerge them in an ice bath. You want to stop any residual cooking.

5) Drain the water

            After cooling them, you want to drain as much water as possible before they go into the freezer. With leafy greens, you will want to squeeze out as much water as you can.

6) Bag them and freeze them

            Once they are drained you want to bag them. Remove as much air as possible from the bag and label the date so that you can know how long they have been in the freezer. Then put them in your freezer, and enjoy at a later date.

Roots:

IMG_2075.JPG

This technique of blanching and then freezing veggies is a great way to store a number of varieties of vegetables, but it doesn’t work for everything. Particularly root vegetables. Luckily, root vegetables when stored properly can last for a very long time. Now the ideal storage conditions for most root veggies is in a root cellar. Unfortunately, most of us do not have access to a root cellar, but this does not mean that we can’t store our root veggies in an effective ways. Without a root cellar, we need to be more intentional about how we are storing each root veggie because they all have different conditions that are optimal for them.

There are two things that you want to keep in mind regardless of what veggie you are working with. Firstly, you want to find a place where they will not freeze. Roots that have been frozen and then thawed will not store well. You also want to handle them carefully and remove any damaged ones. This is because bruised veggies will rot faster, and this rot will spread to other roots that are touching them.

Carrots, beets, and turnips

Start by removing the tops. If the leaves are left on, they will draw moisture away from the roots. These roots prefer temperatures between 32˚F - 40˚F and store best when buried in damp, but not wet, sand. You want to take a container and fill it with a row of veggies that aren’t touching and then bury them in sand, then add another row. You want to keep this sand damp, to prevent the roots from drying out, but if it is too wet them will start to rot. These veggies also like high humidity when you store them. You can also use saw dust or wood chips if you cannot find sand.

Potatoes

Growingpotato-1024x714.jpg

Potatoes are a staple of this valley. For long term storage of them, you want to start out by drying them after harvest. They will be dry within an hour or two of harvest, so this does not take a long time. Next, you want to clean them off. Do this by brushing them off, not by washing them. Once they are brushed off you want to remove any bad or bruised potatoes to ensure that rot doesn’t spread to others. Once you have your potatoes that you are going to store, you want to find a cool and dry location. Potatoes like temperatures between 35˚F-40˚F. Store them in a container that is dark. This could be a box or a cotton sack. It can be helpful to put a layer of newspaper in between your potatoes as you layer them in.

Garlic, shallots and Onions.

DSC_1600.JPG

With these bulbs, dryness is more important than temperature. You want to make sure that after harvesting them they have had ample time to dry out. For this, you want to hang them up either by their greens, or in a basket (pantyhose can work well for this) for two to three weeks. Once they have dried, you can either continue to store them where they are or you can move them to a new location. As long as they are stored somewhere dry with good airflow they will be fine.

There are many elements of gardening that make it an enjoyable activity; the therapeutic element of green spaces, the fresh air from being outside, and the pride in stewarding something and watching it grow. These are all amazing things that we get from gardens, but beneath all of this is a utilitarian element of providing food for ourselves, and it is our job to know how to best utilize this food. This involves understanding techniques to store our harvests, because one of the saddest things in this world is to watch good vegetables go to waste.